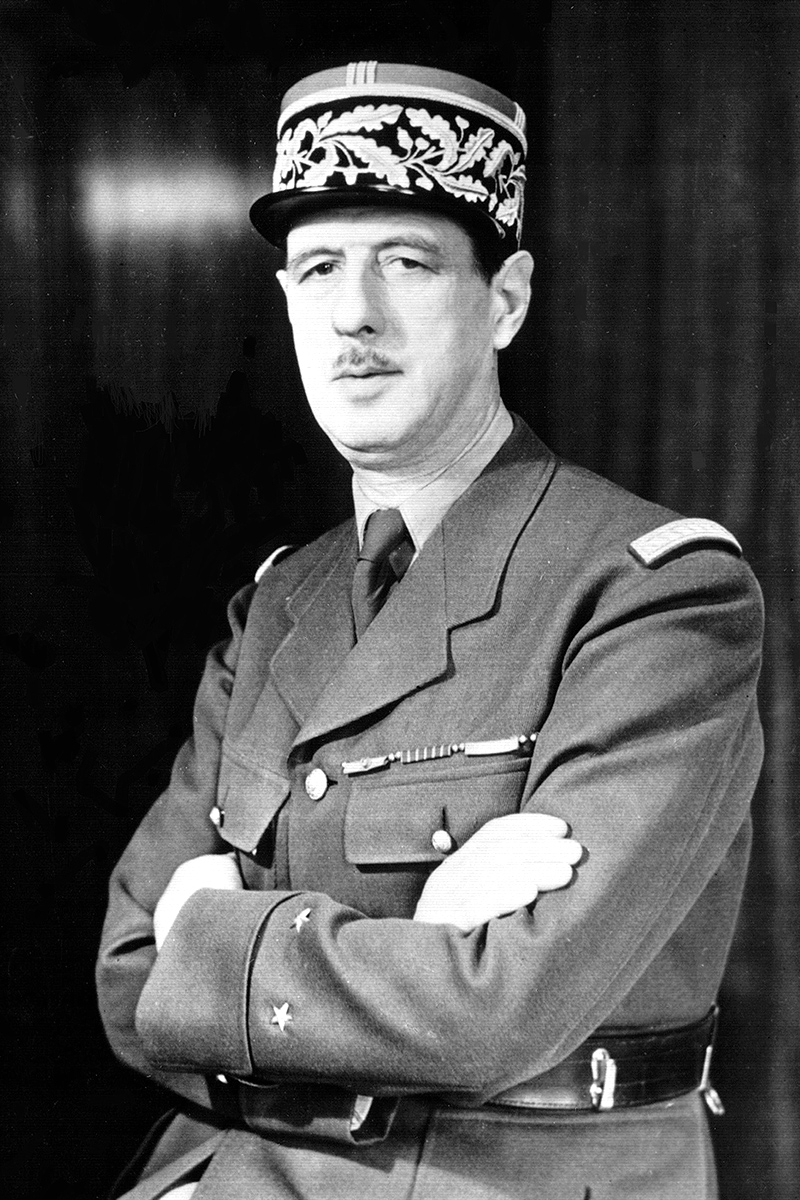
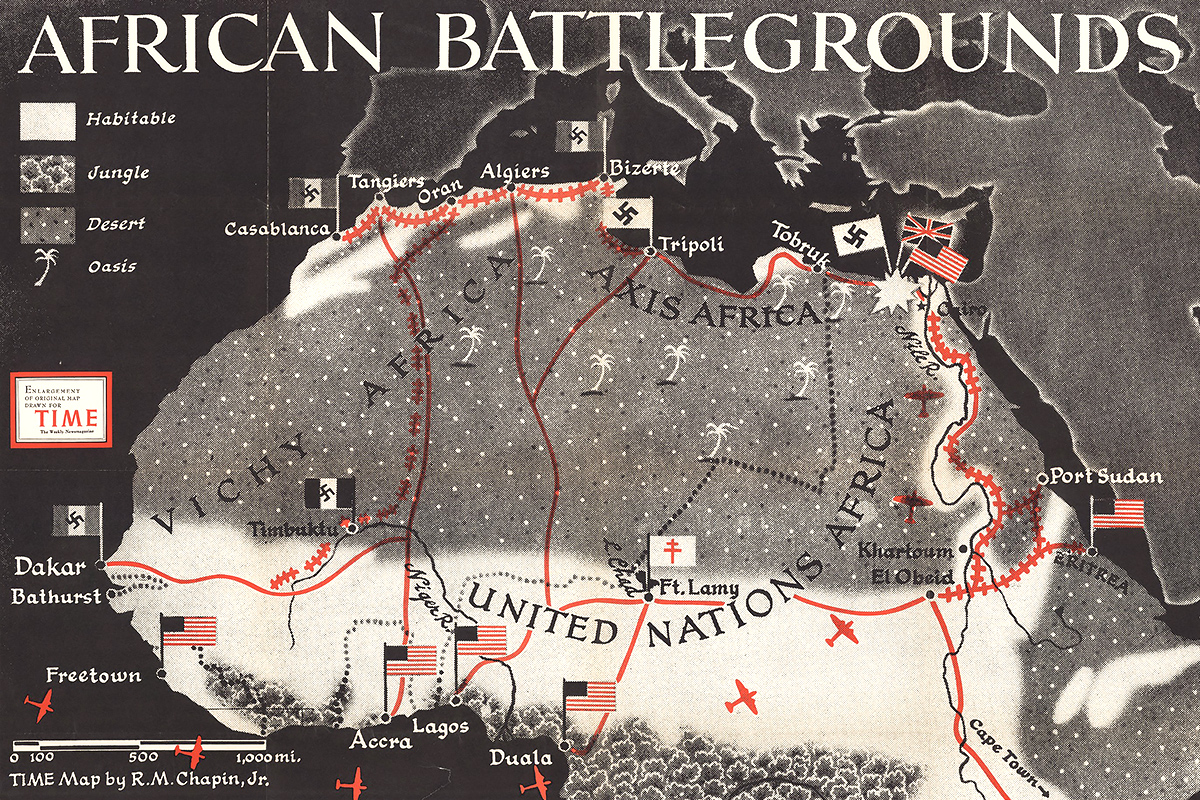
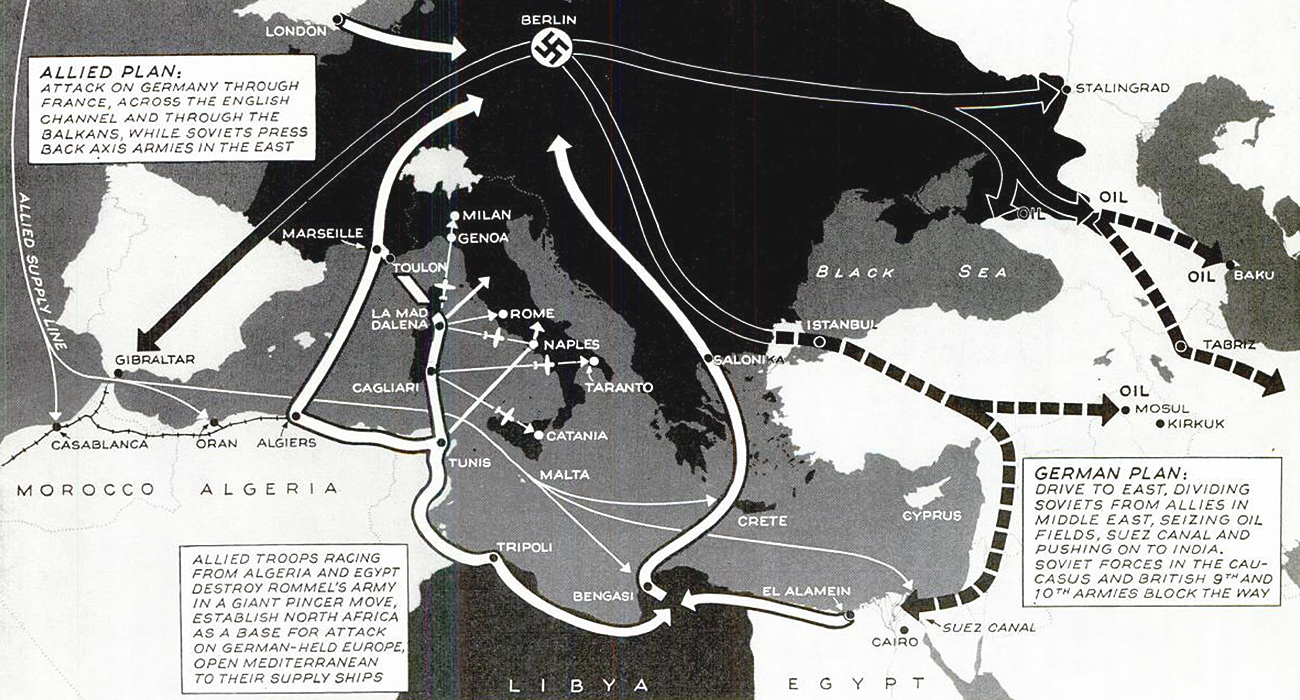
Following the Nazi conquest of Europe, the focus of the Second World War in the West shifted to Africa. Commonwealth forces joined with the Free French under Charles de Gaulle to drive the Italians out of East Africa and Cyrenaica. The war went so poorly for the Italians that Adolf Hitler had to send in Erwin Rommel, who managed to push the British halfway into Egypt before he was stopped.
The front switched back and forth several times, and for a while it seemed that the Axis might reach the Suez Canal, which would have put the British Empire’s supply lines in serious jeopardy. A decisive victory for the British at the Second Battle of El Alamein and American reinforcements in 1942 turned things around. The Axis powers were cornered in Tunisia, which would serve as a springboard for the Allied invasion of Italy.
Free French
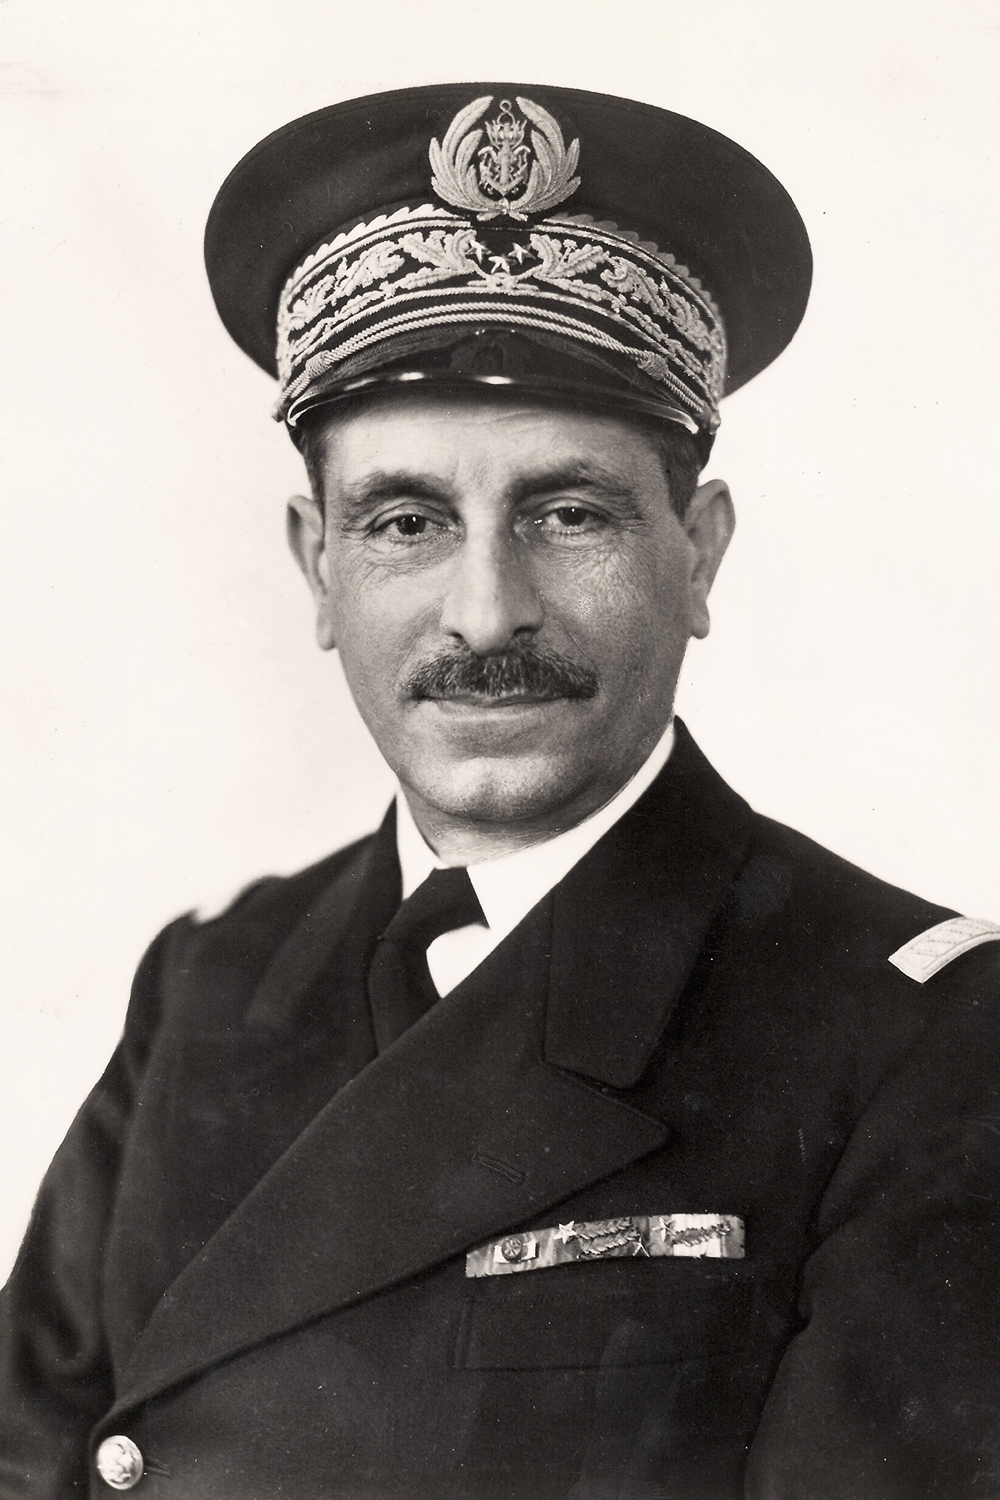
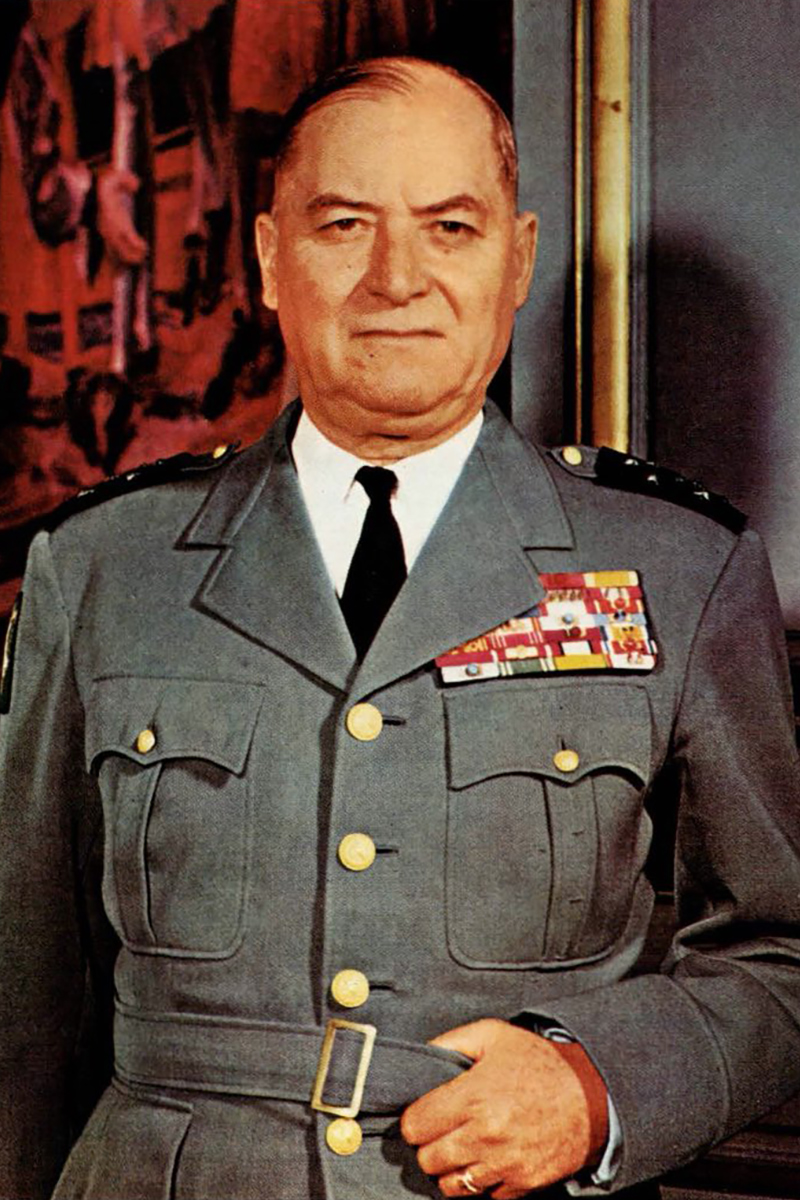
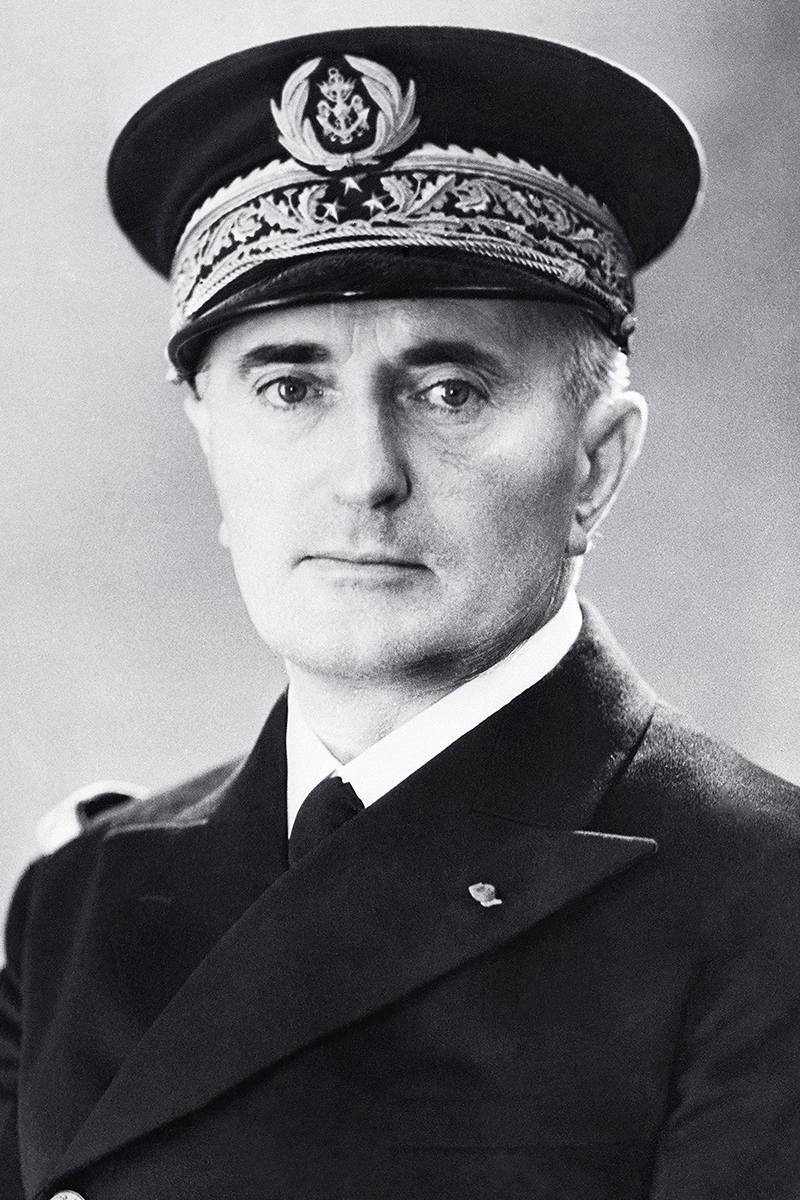
De Gaulle started with almost nothing. After the fall of France, the Soviet Union and the United States had recognized the collaborationist French government in Vichy. Admiral François Darlan refused to surrender the French fleet moored in Algeria, leading to a British attack on July 3. Admiral Émile Muselier was the only other top French military leader who followed De Gaulle. Their forces comprised fewer than 10,000 men.
The number would grow to an estimated 40,000 whites, 30,000 colonial soldier and 3,800 Foreign Legionnaires later in 1940 — still a small fighting force.
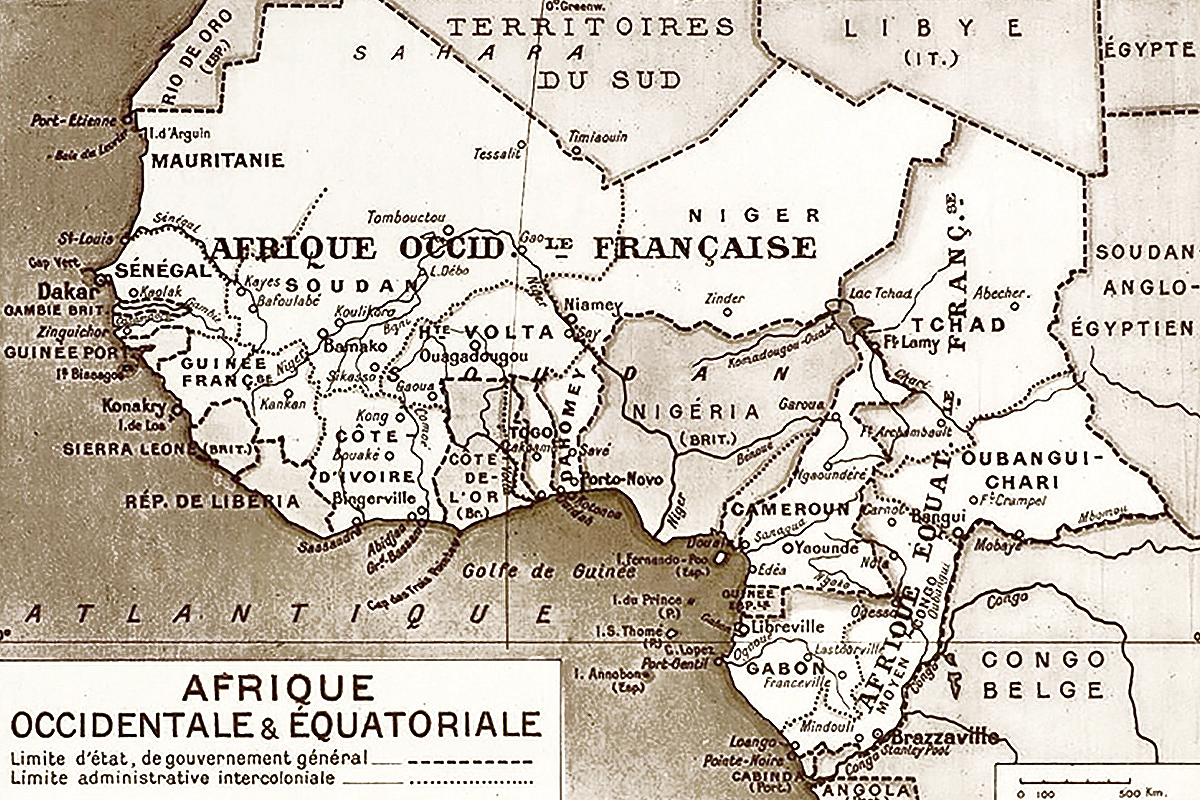
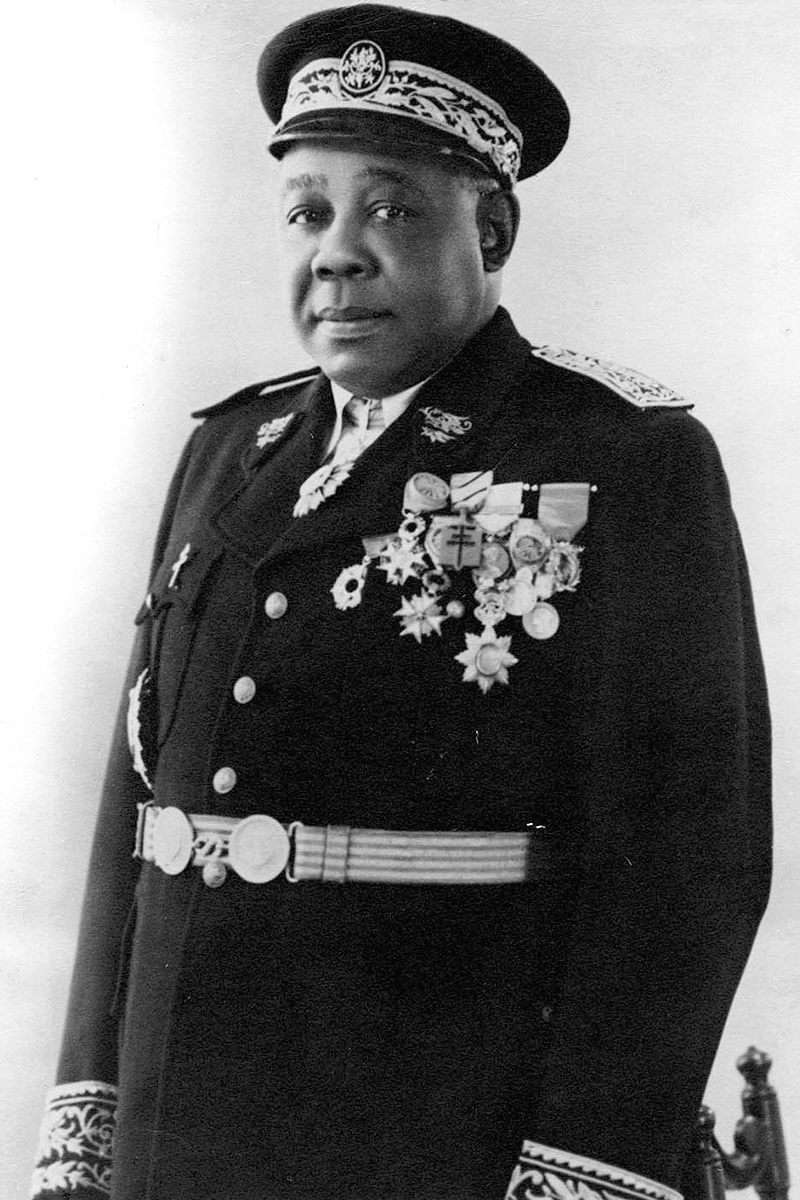
The only French colony that joined the cause from the start were the New Hebrides in the Pacific. It was not until August that De Gaulle gained a foothold in French Equatorial Africa. Félix Éboué, the governor of French Chad, was instrumental in rallying support.
The first test of De Gaulle’s army came in September 1940, when a combined Anglo-French force attempted to take the strategic port of Dakar in French West Africa. De Gaulle’s hope was to overthrow the Vichy regime in the colony, but it unexpectedly held firm under British naval bombardment. An attempt to put Free French soldiers ashore failed. Operation Menace was a humiliation for De Gaulle, who had failed to prove himself to the British.

His fortunes changed in November, when General Philippe Leclerc de Hauteclocque, supported by aircraft operating out of Douala in French Cameroon, invaded and seized Gabon. French Equatorial Africa was united once again, under De Gaulle. He now had a base from which to strike against the Italians.
Compass
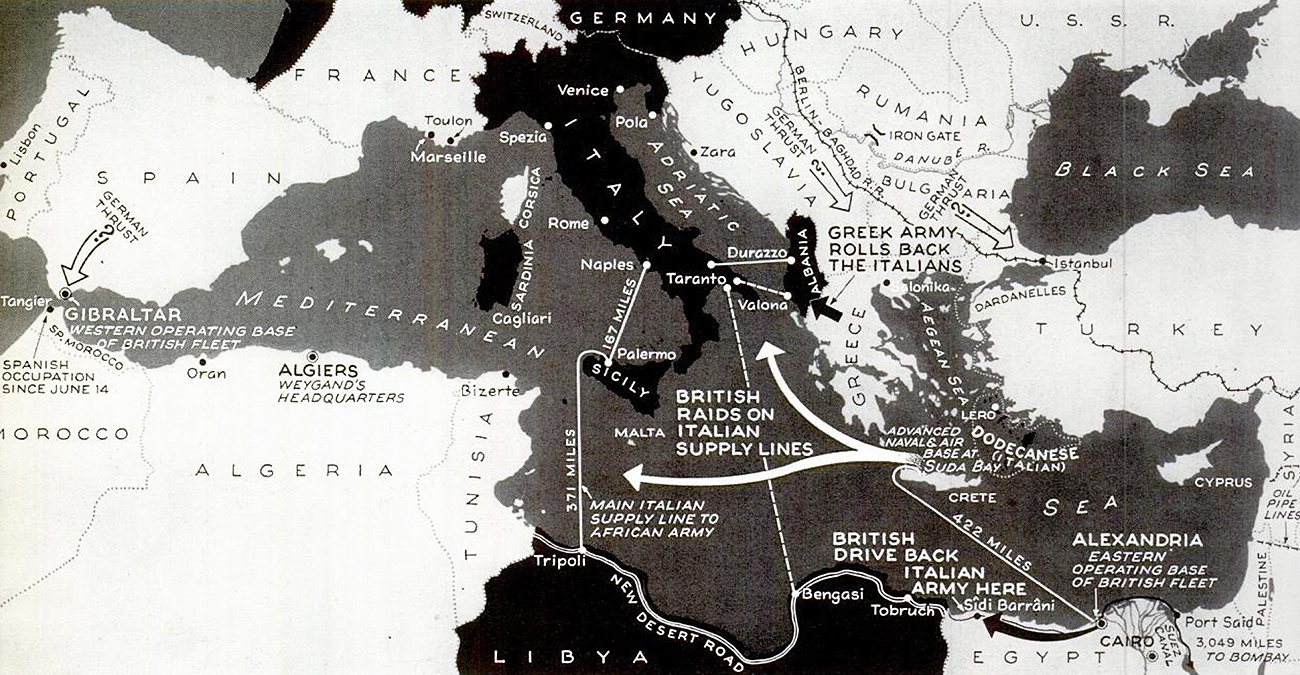
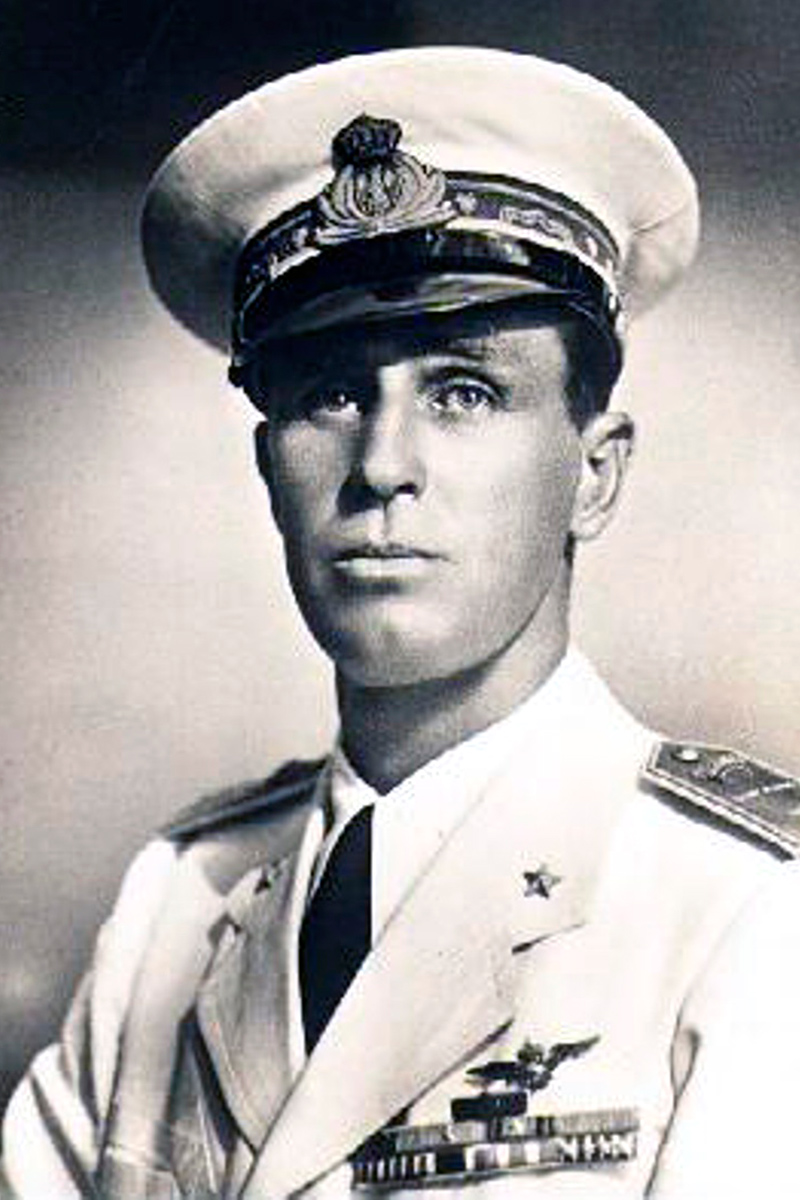
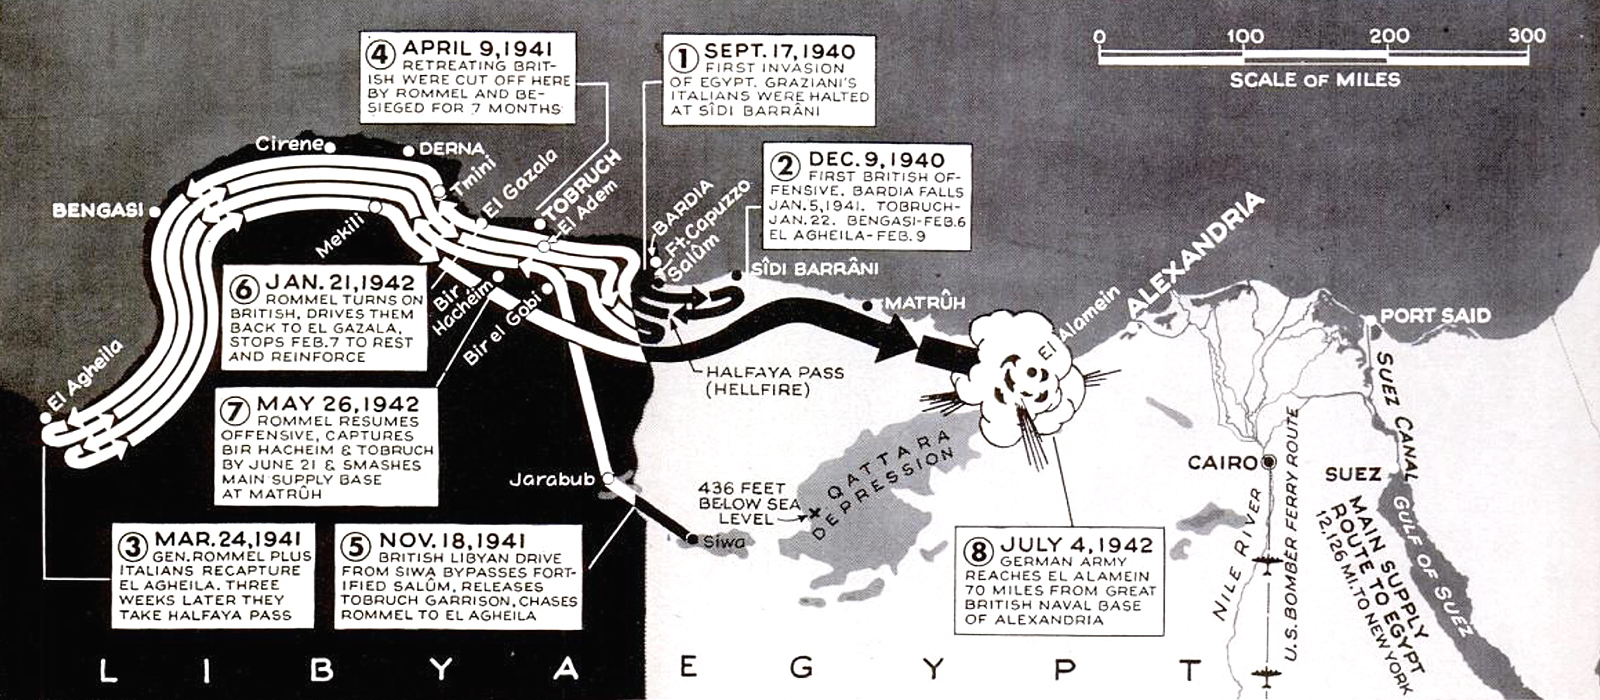
Benito Mussolini, the Italian dictator, had had no plans to attack Egypt until the fall of France whetted his appetite for conquest. He ordered an invasion, which began on September 6.
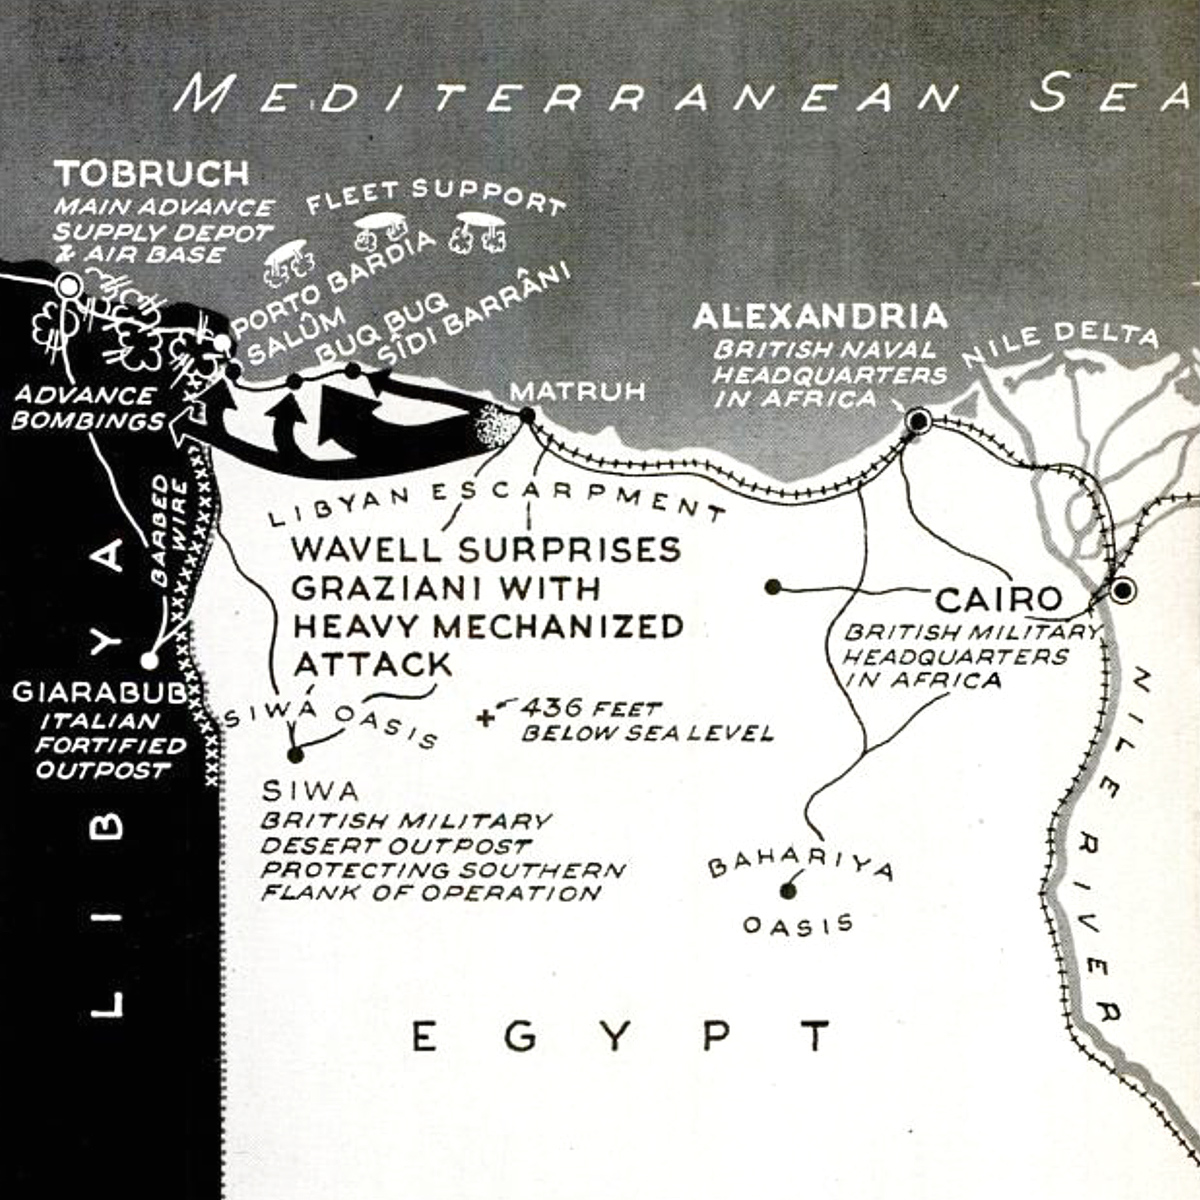
The ultimate goal was to seize the Suez Canal, upon which Britain’s communications and supplies with its empire in Asia depended. But after numerous delays, the scope of the offensive was reduced to an advance barely 100 kilometers (62 miles) into Egypt, toward Sidi Barrani. Facing little resistance, the Italians reached the town on September 16, where they dug in. The plan was to wait for engineers to build a road and for supplies to reach Sidi Barrani before attacking the main British fighting force at Mersa Matruh.
The Italians never had the chance. Commonwealth forces launched a counteroffensive, named Operation Compass, before dawn on December 9. The Italian position at Sidi Barrani collapsed within two days. The Italians fled back into Libya.
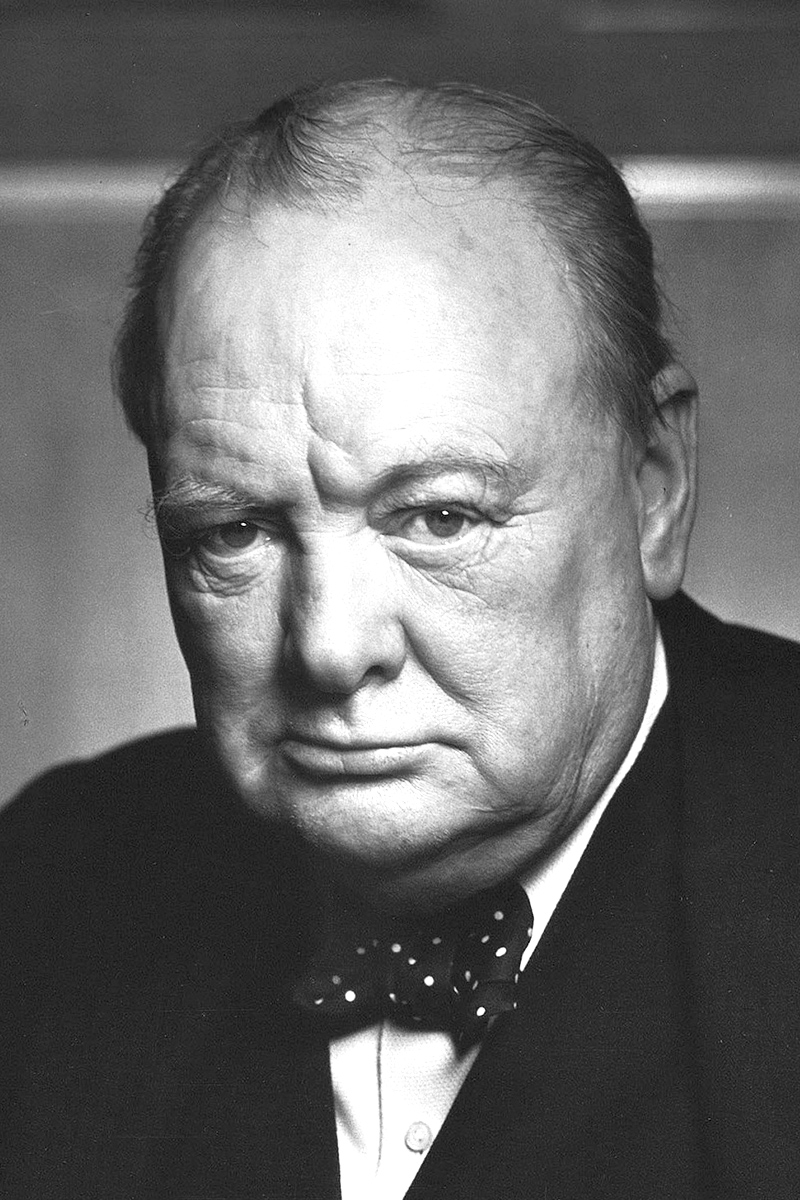
The British gave chase and pursued the Italians along the entire coast of Cyrenaica, from Tobruk to Derna, past Benghazi, to El Agheila on the Gulf of Sirte, before Prime Minister Winston Churchill demanded soldiers for the defense of Greece, where Germany had come to the aid of a similarly ill-fated Italian invasion.
Free French Forces under Leclerc played their part by attacking the Italian fort at Kufra in the Cyrenaican desert. The Italians had more men and four aircraft, but they were led by an inexperienced reserve captain who gave up after nearly four weeks of battle. Leclerc and his men swore the following day, on March 2, that they would not stop fighting until the flag of a free France would again fly over the Cathedral of Strasbourg in the northeast of their country — an oath they fulfilled three and a half years later, when Leclerc and the French 2nd Armored Division liberated the city.
Italian East Africa
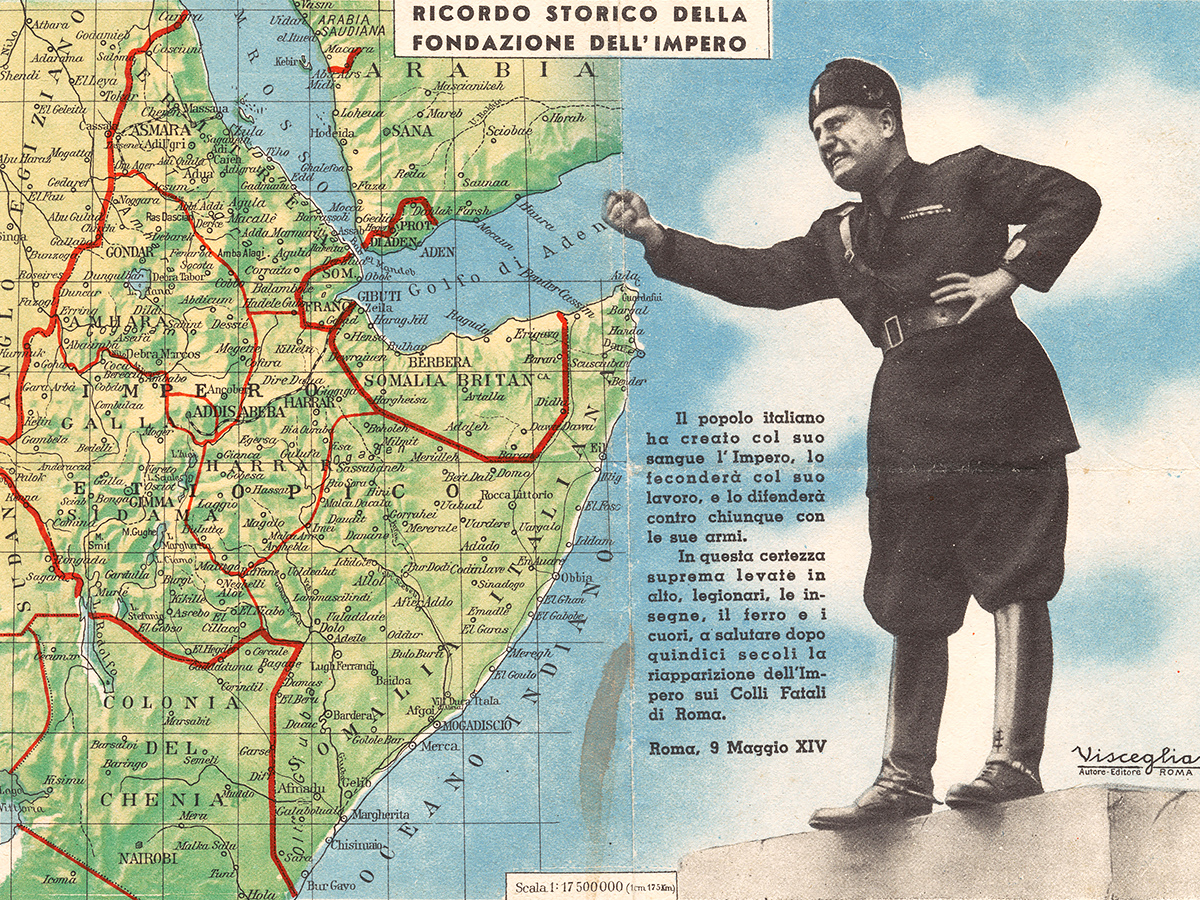
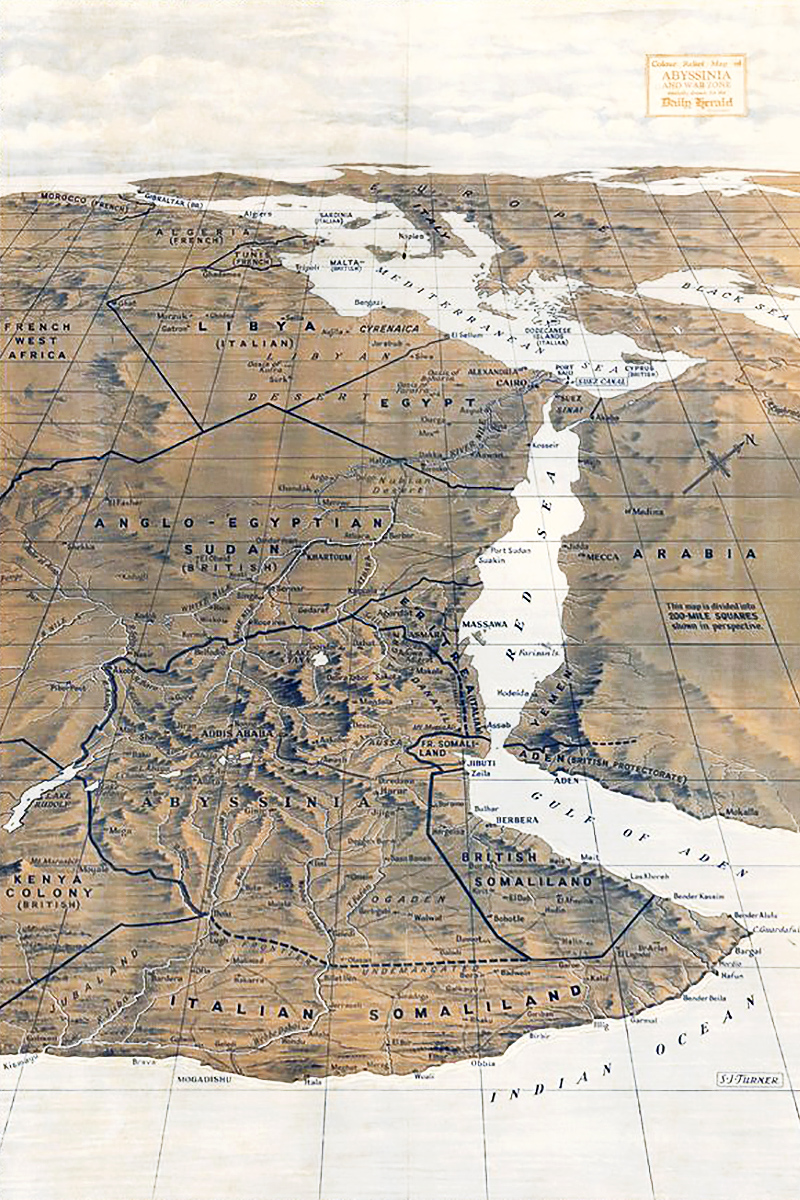
Italy fared little better in East Africa. It had occupied British Somaliland in August 1940, giving it command of the southern coast of the Gulf of Aden and the narrow entry into the Red Sea. (Neighboring French Somaliland, now Djibouti, was loyal to Vichy.)
Still supreme at sea, the Royal Navy intervened and quickly secured the access routes to East Africa. Far from severing the British Empire’s supply lines, it were the Italians in Africa who were cut off from Europe.
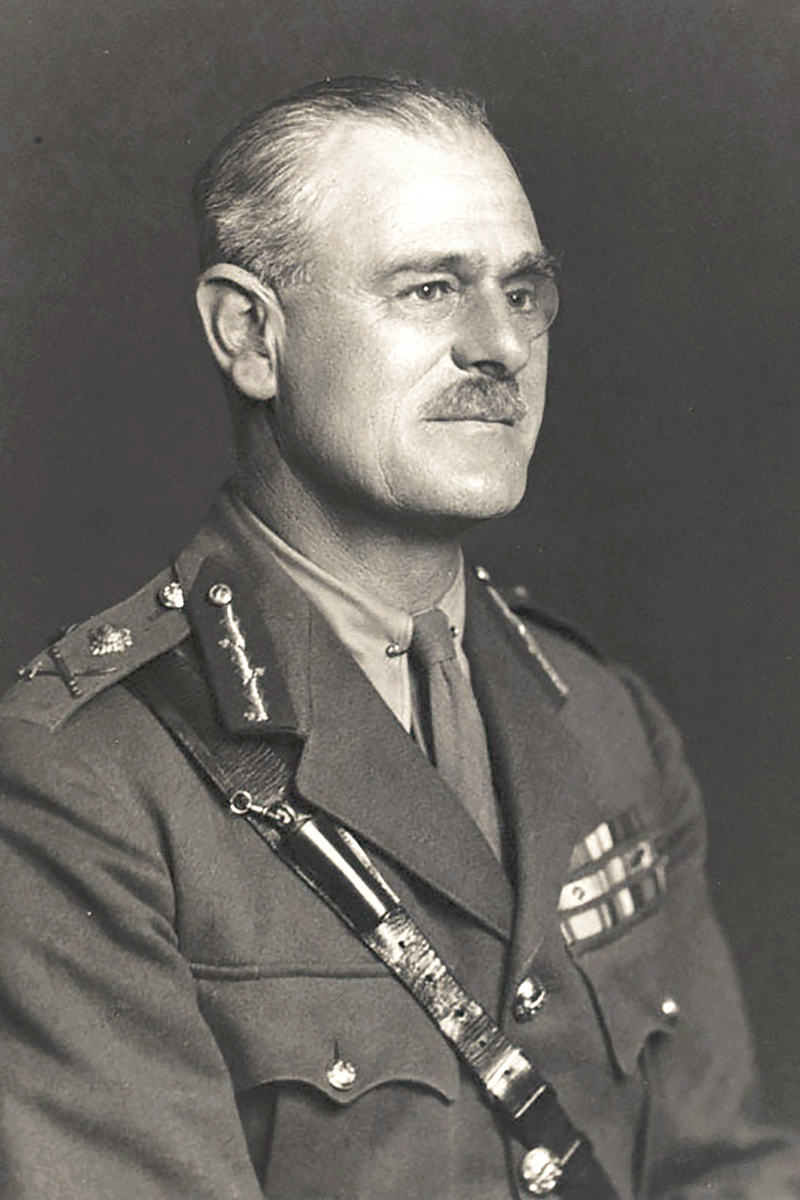
The next step was taking back Somaliland and driving into the heart of Mussolini’s East African empire. The Italian dictator’s local deputy was Prince Amedeo, duke of Aosta, viceroy and commander-in-chief. The Allied campaign was orchestrated from Cairo by General Archibald Wavell, the head of all British forces in the Middle East.
Dudley Clarke, a pioneer in military deception and one of the founding fathers of the British Commandos, successfully fooled the Italians into thinking reinforcements from India would attempt to take back Somaliland. But rather than reinforce the occupied colony, as Clarke had expected, the Italians withdrew! Unfortunately, they withdrew into Eritrea, which is where the British were actually about to attack.

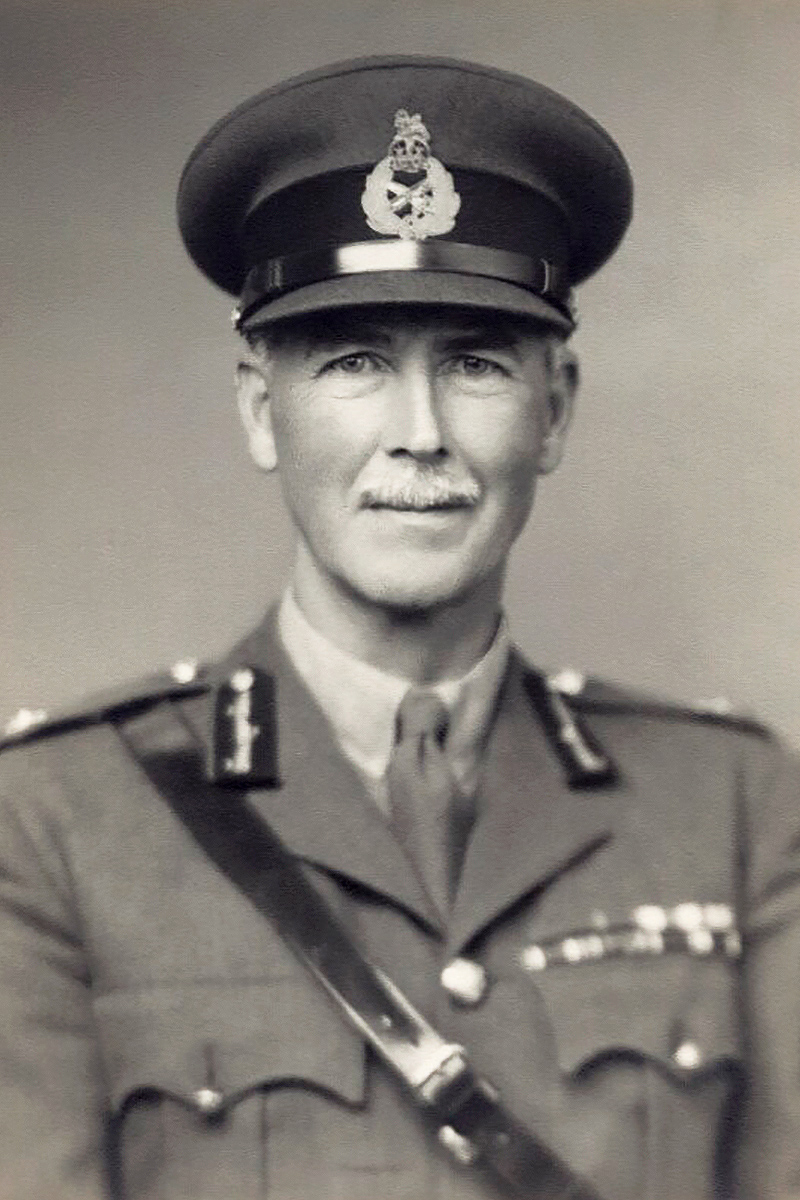
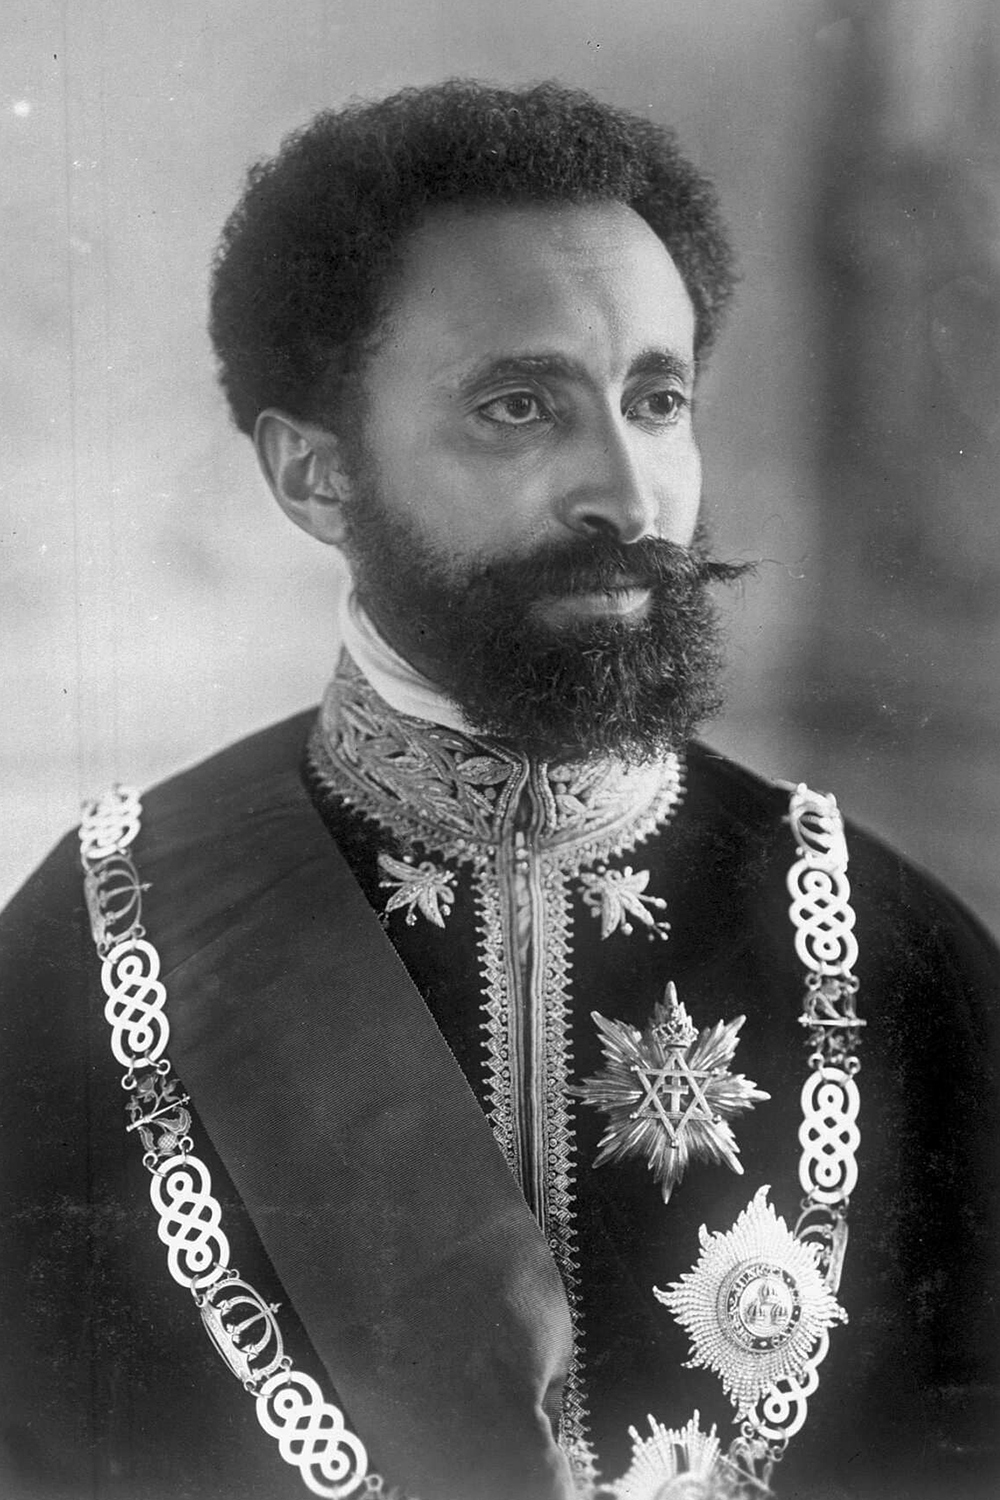
The Italians were still beaten. Commonwealth (mostly Indian and Sudanese) as well as Free French forces, commanded by General William Platt, swept in from the Anglo-Egyptian Sudan. Ghanaian, Nigerian and South African forces, landing at Mogadishu and operating out of Kenya under General Alan Cunningham, linked up with them at Addis Ababa in April, where Emperor Haile Selassie was restored to the throne.
With supplies running low, and no chance of resupply, the duke of Aosta chose to concentrate his remaining forces in several strongholds. The viceroy himself holed up with 7,000 soldiers in Amba Alagi in the mountains of northwest Ethiopia, where they held off Commonwealth and Ethiopian attacks for two weeks before surrendering to Cunningham on May 19, 1941.
Some garrisons continued to fight until as late as 1943, but Amedeo’s capitulation marked the end of significant Italian control in East Africa.
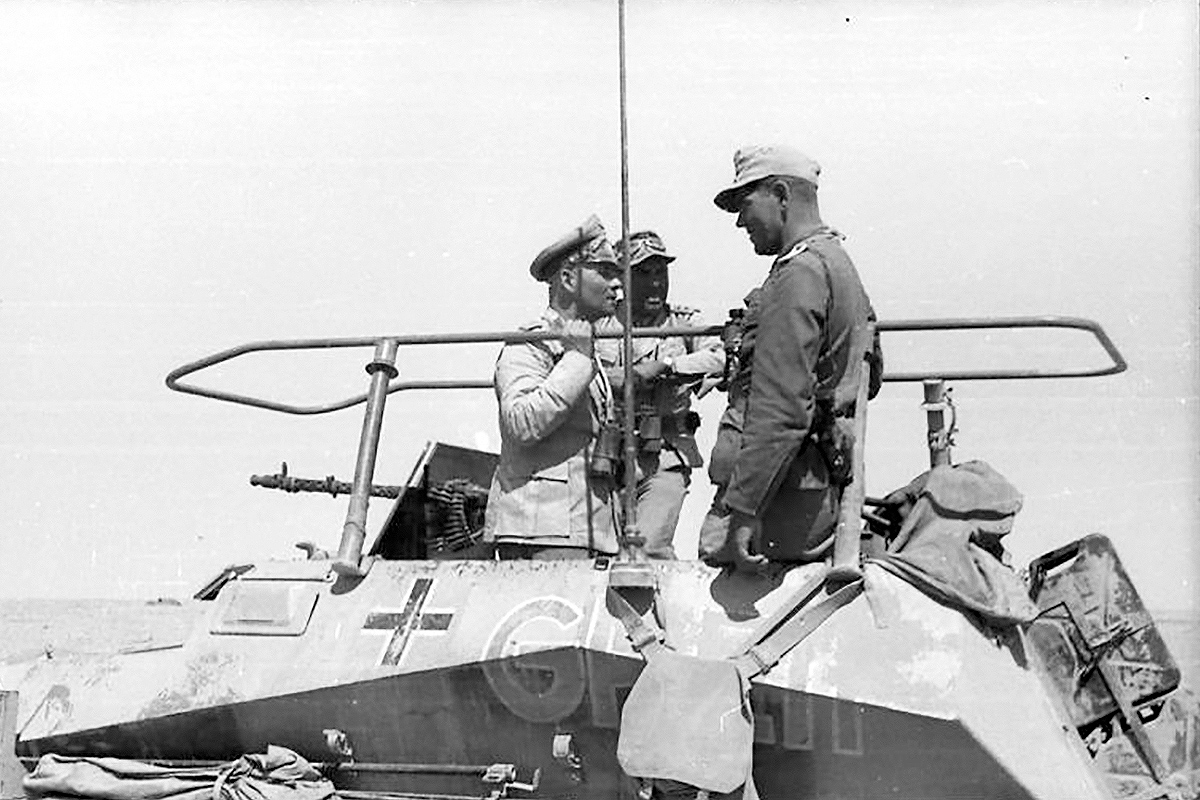
Rommel on the offensive

The situation in Libya reversed completely in the spring of 1941. Battle-hardened Commonwealth troops had been sent to Greece while General Erwin Rommel arrived in Tripoli to prop up the Italians. His Deutsches Afrikakorps, known as the Afrika Korps in English, was equipped with desert-proof tanks and able to drive the Allies from El Agheila all the way back to Tobruk in just two weeks.
Wavell was blamed for underestimating Rommel, and he had. He didn’t think the Axis would be ready to launch another offensive until May and had left Cyrenaica lightly defended by Australian soldiers.
But the fault was also Churchill’s, who had ordered the diversion of North African troops to Greece, where they failed to make a difference and suffered heavy losses, and to Iraq, where pro-Axis generals had overthrown the pro-British regime of Regent ‘Abd al-Ilah. This didn’t leave Wavell with many options.
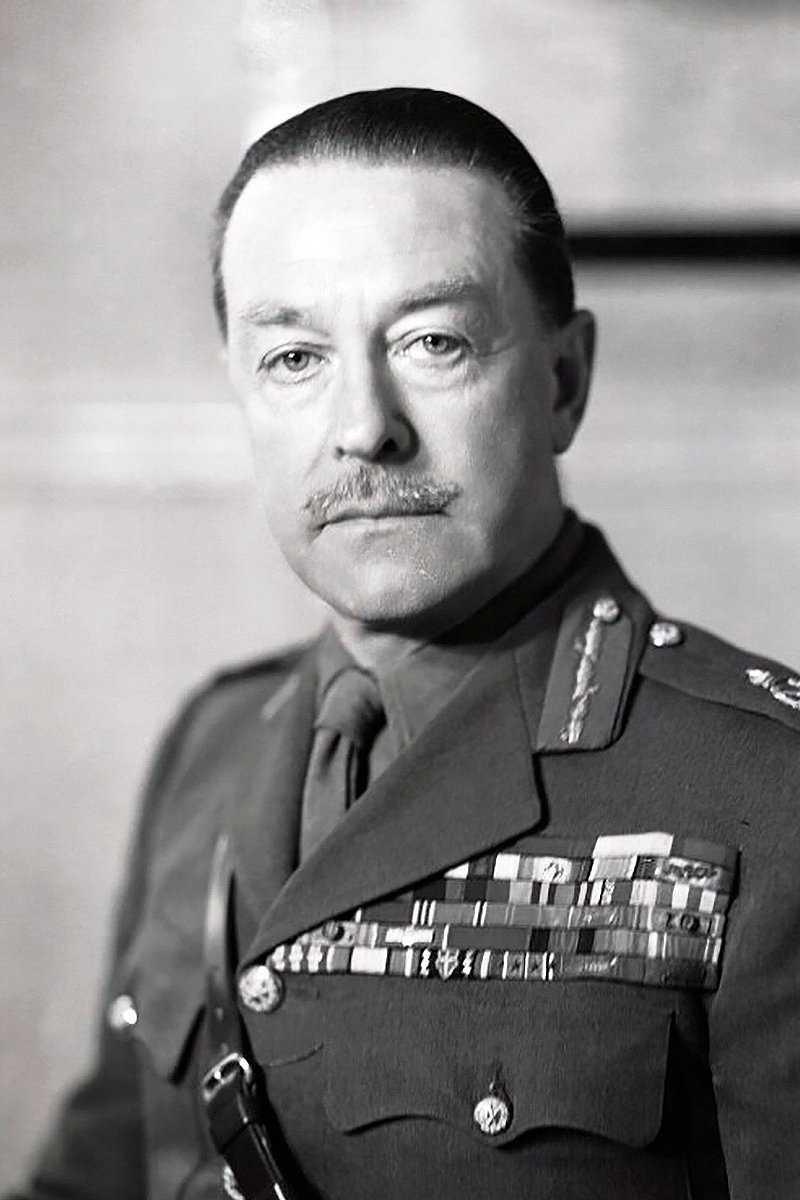
Wavell was nevertheless sent to India in July. General Claude Auchinleck, commander-in-chief of the Indian Army, was sent to Egypt instead, from where he would have to organize the relief of Tobruk.
Some 25,000 Allied troops, well stocked with supplies and linked to Egypt by the Royal Navy, were holed up in the city, from where they could block further Axis advances eastward. Rommel besieged Tobruk for seven months. Two attempts to relieve it failed before the newly-formed Eighth Army, initially commanded by Cunningham and later by General Neil Ritchie, managed to repel the Afrika Korps in what was called Operation Crusader.
Now it was Rommel’s turn to fall back to El Agheila. By the end of 1941, all his gains had been reversed.
But Auchinleck cheered too soon when he wrote London in January 1942 that the Axis were “beginning to feel the strain.” The “Desert Fox,” as the British press had started to call Rommel in grudging admiration, was on the verge of launching another attack that would see him advance as far east as El Alamein, 400 kilometers (250 miles) from the Libyan border and only 150 kilometers (90 miles) from Alexandria.
The Desert Fox strikes again
The British again underestimated Rommel. They calculated he had fewer than half of his 80,000 men left and expected he would need until February 1942 to be resupplied.
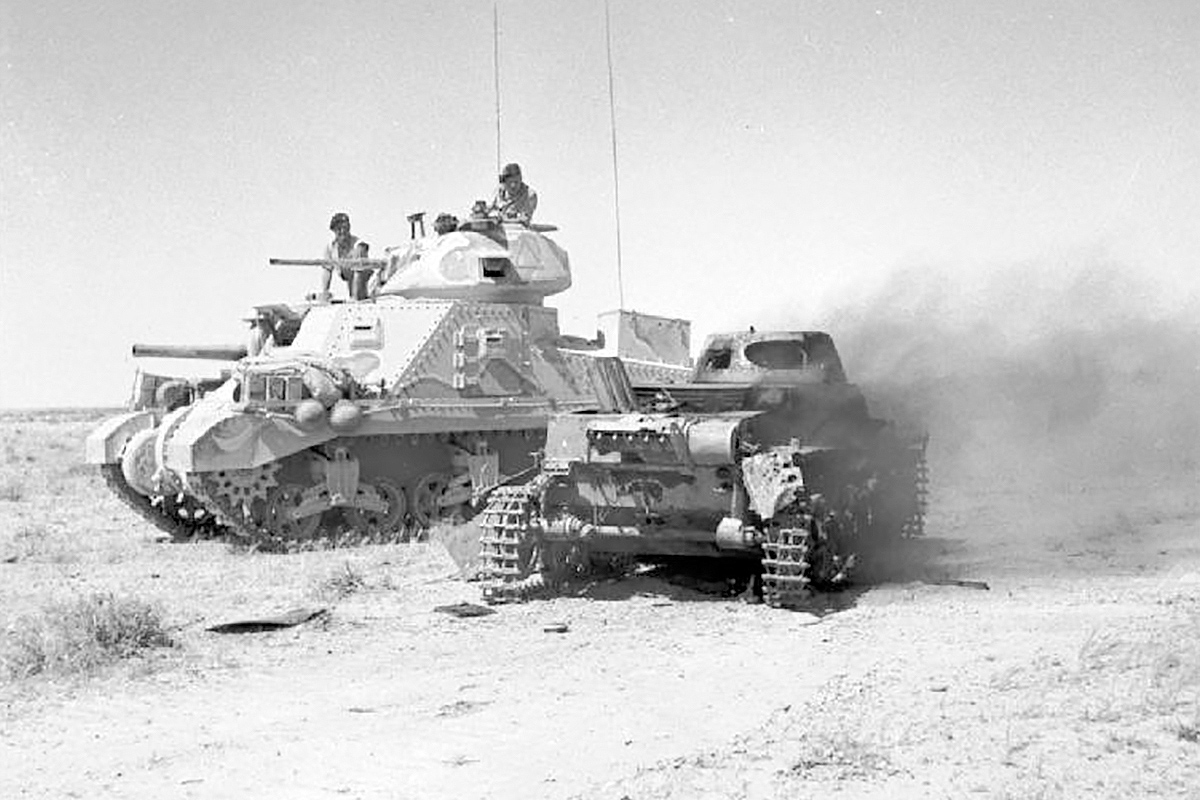
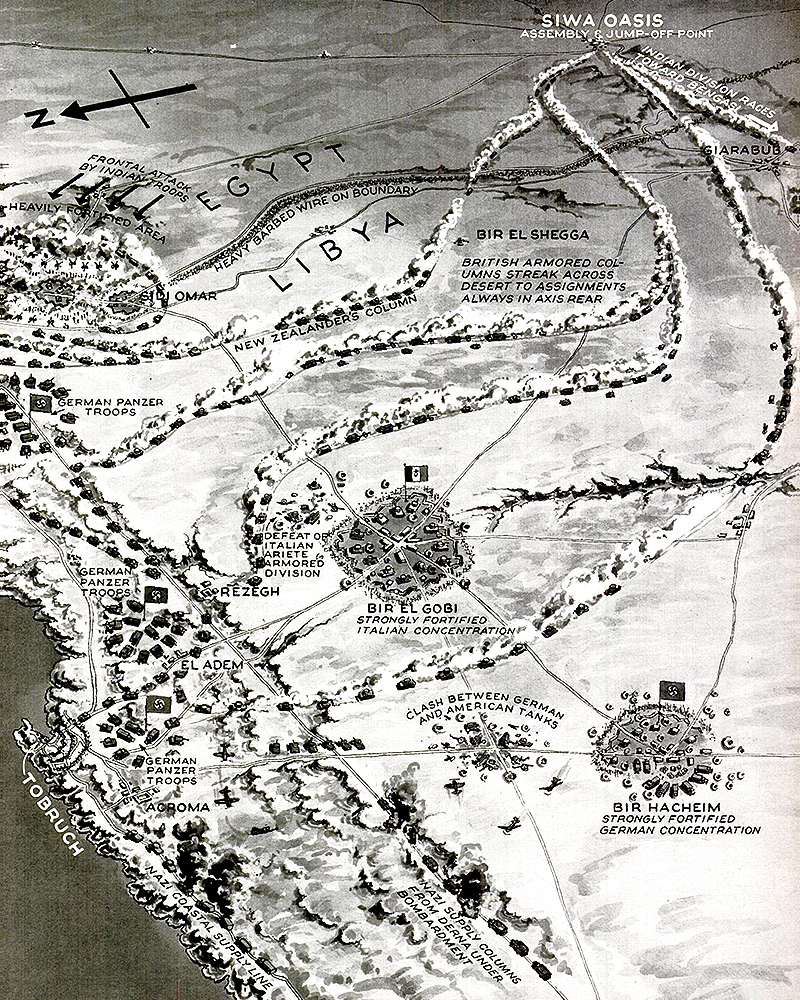
Rommel in fact attacked in January. The 1st Armored Division, which held the frontline at El Agheila, lost 61 out of ninety tanks for only seven German tanks lost. Rommel drove the British back to Gazala, a few miles west of Tobruk, in one month. He attempted to outflank the Allied position from the south, as had become his signature move, but this time Free French soldiers and powerful M3 Grant tanks from America — which had just entered the war — slowed him down.
Rommel dug in and Ritchie ordered a counterattack, called Operation Aberdeen. It failed on all fronts. By the end of June 13 — Black Saturday — Allied tank strength had been reduced from 300 to about seventy and the Afrika Korps had established armored superiority as well as a dominating line of positions, forcing the Eighth Army to retreat. Tobruk fell on June 21. Some 35,000 Allied troops were taken prisoner.
Churchill later called it one of the heaviest blows of the war. Hitler rewarded Rommel with a promotion to field marshal, the youngest German officer ever to achieve the rank. Rommel remarked he would have preferred another Panzer division. Auchinleck sacked Ritchie and took command of the Eighth Army himself.
Stalemate at El Alamein

Rommel’s success convinced Hitler and Mussolini to cancel their planned invasion of Malta and aim for the Suez Canal instead. Auchinleck decided to make his stand at El Alamein. Located deep inside Egypt, a defense there would benefit from shorter Allied supply lines. The Desert Air Force would be able to harass Rommel’s Panzers without opposition from German or Italian warplanes, which were out of range. And the presence of the Qattara Depression to the south made an Axis outflanking maneuver unlikely.
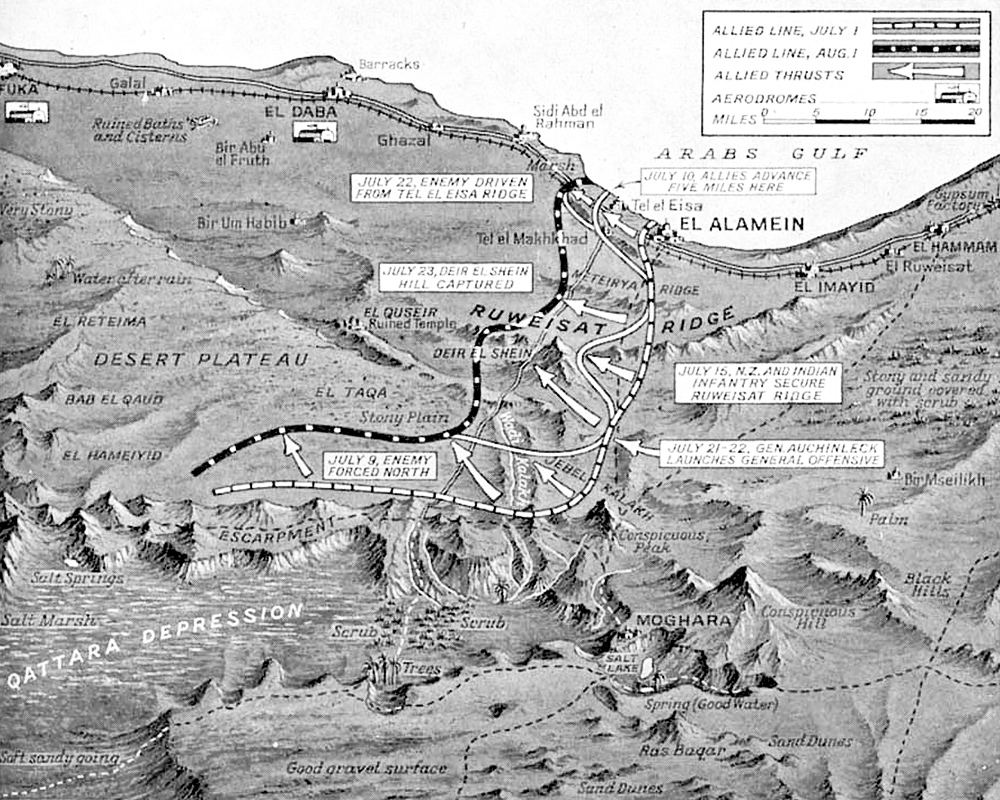
Except for a token defense at Mersa Matruh, the road to El Alamein was clear for Rommel. But lengthening supply lines and Allied air attacks, which could reach as far west as Benghazi, took their toll. By the time he arrived at El Alamein on June 30, Rommel was down to sixty German and fourteen Italian tanks. He was also running out of ammunition and fuel.
The attack began in the early morning of July 1 and lasted four days. It made no progress. Rommel was reduced to thirty serviceable tanks. Fighting continued until the end of the month, but neither side was able to deliver the decisive blow.
Auchinleck concentrated his firepower on the Italian lines, where he believed morale was low. Rommel would later blame poor Italian leadership and the Italians’ failure to supply him by sea for his inability to break through at El Alamein — not suspecting that the British had broken Axis military codes and could intercept Italian convoys with pinpoint precision.
In the end, some 10,000 German and Italian troops were killed or wounded. Another 7,000 were taken prisoner. The British suffered 13,250 casualties.

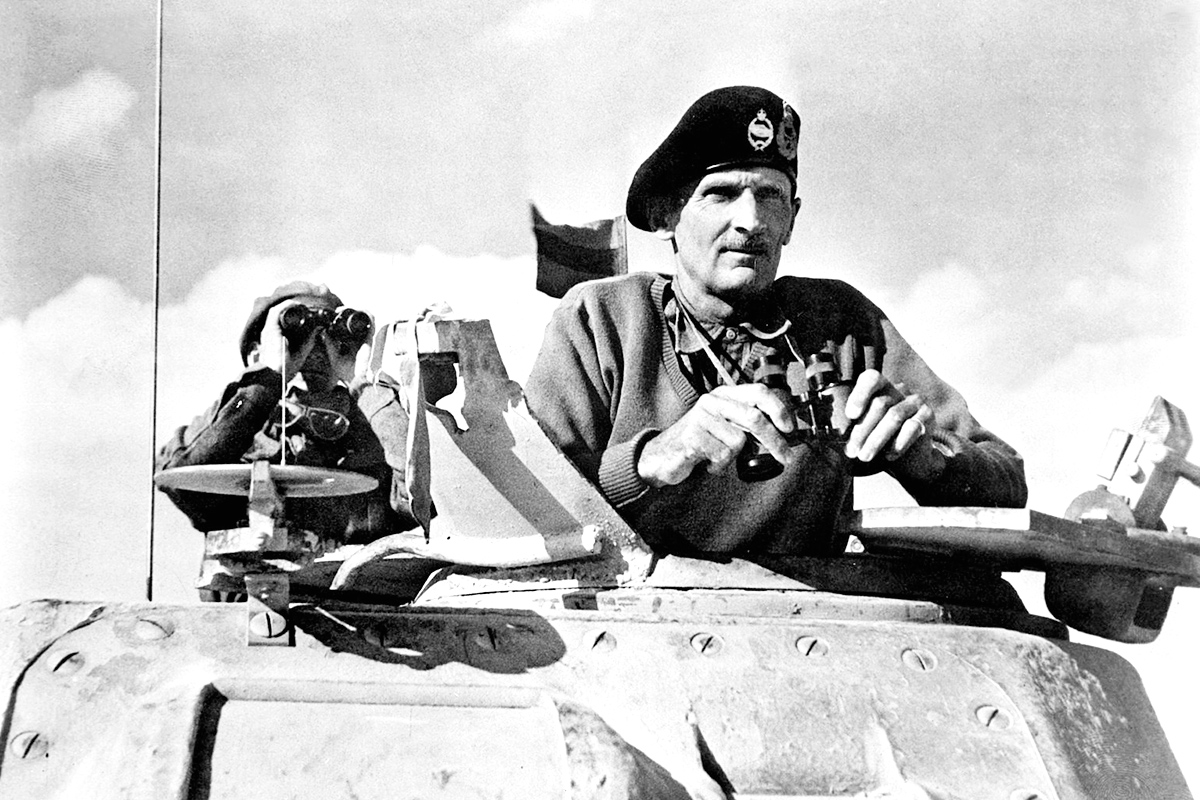
Auchinleck had halted the Axis advance, but the First Battle of El Alamein could hardly be called a victory for the Allies. Churchill replaced him with William Gott as Eighth Army commander and General Sir Harold Alexander as commander-in-chief Middle East. Gott was killed before he could assume his post. Lieutenant-General Bernard Montgomery was appointed in his stead and took command on August 13.
Rommel made one last attempt to reach Cairo before Allied reinforcements could arrive in September. With some 200 German tanks and 243 Italian tanks, against 700 on the British side, he dove into the gap between El Alamein and the Qattara Depression. Montgomery, forewarned by decoded German radio messages, had deliberately pulled the bulk of the Eighth Army back to the Alam el Halfa Ridge, from where his dug-in tanks could serve as anti-tank guns and from behind which Allied aircraft could strafe the Axis continuously. Rommel lost 1,750 men and 49 tanks in the Battle of Alam el Halfa against 1,750 men and 68 tanks under Montgomery.
Turning point
After his failure to take El Alamein, Rommel was in the much weaker position. Whereas the Eighth Army was adding men from the Free French, the Free Greeks and Britain’s vast overseas empire, as well as trucks and new Sherman tanks from the United States, Germany could not afford to divert troops from the Eastern Front while convoys across the Mediterranean were frequently intercepted and sunk by the Royal Navy. To make his predicament complete, Rommel had fallen ill and was due to be replaced by General Georg Stumme.
Rommel’s hope was that Germany would win the Battle of Stalingrad and reach the Caspian Sea, enabling it to menace Allied-held Iran and Iraq from the Caucasus, which would then force the British to send troops from Egypt to the Middle East. In the meantime, he saw no choice but to dug in west of El Alamein.
Unsure where the British would attack, short on fuel and about to take sick leave in Germany, Rommel departed from his usual practice of holding the bulk of his armored strength in reserve and split them into a northern and a southern group with about 125 tanks each.
The Allied assault commenced on the night of October 23. Following a massive bombardment, infantry and engineers went in first to clear the area of mines. Progress was slower than expected, but it still took the Axis by surprise. Stumme went to survey the battlefield the next day only to suffer a fatal heart attack under fire. Temporary command was given to Major-General Wilhelm Ritter von Thoma. Rommel flew from Germany to Rome to appeal to the Italians for more ammunition and fuel before returning to North Africa.
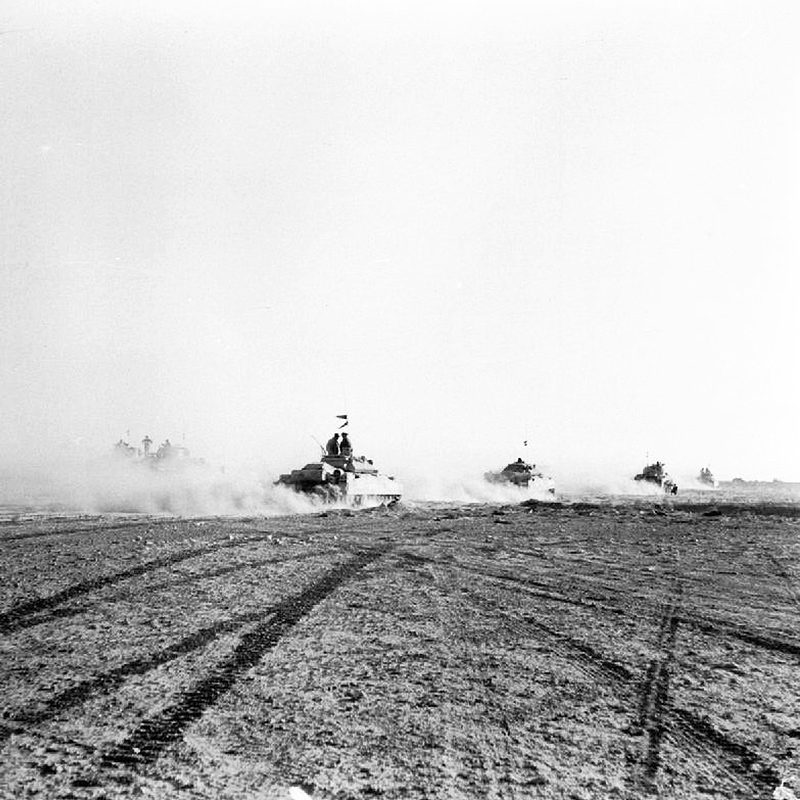
The next few days saw heavy fighting, with losses mounting on both sides, but neither able to move the frontline. By the end of October, the Axis were down to fewer than 300 tanks against 800 on the British side. The former were so low on fuel that retreat was not an option. Rommel told his commanders, “We have only one choice and that is to fight to the end at Alamein.”
He changed his mind after a major tank battle on November 2, dubbed the “Hammering of the Panzers,” which reduced the Afrika Korps to 35 tanks. To forestall the destruction of his army, Rommel asked Hitler for permission to withdraw, which the Führer denied.
The last of the Italian armor was destroyed on November 4. The men of the 40th Italian Infantry Regiment fought until they ran out of bullets. Rommel once again telegraphed Hitler for permission to fall back, but this time he didn’t wait for a reply.
30,500 to 59,000 men, out of 116,000, were killed or wounded on the Axis side in the Second Battle of El Alamein. The Allies lost 13,560 out of 195,000. Both sides lost up to 500 tanks, but the Axis had gone in with only 547 against 1,029 for the British.
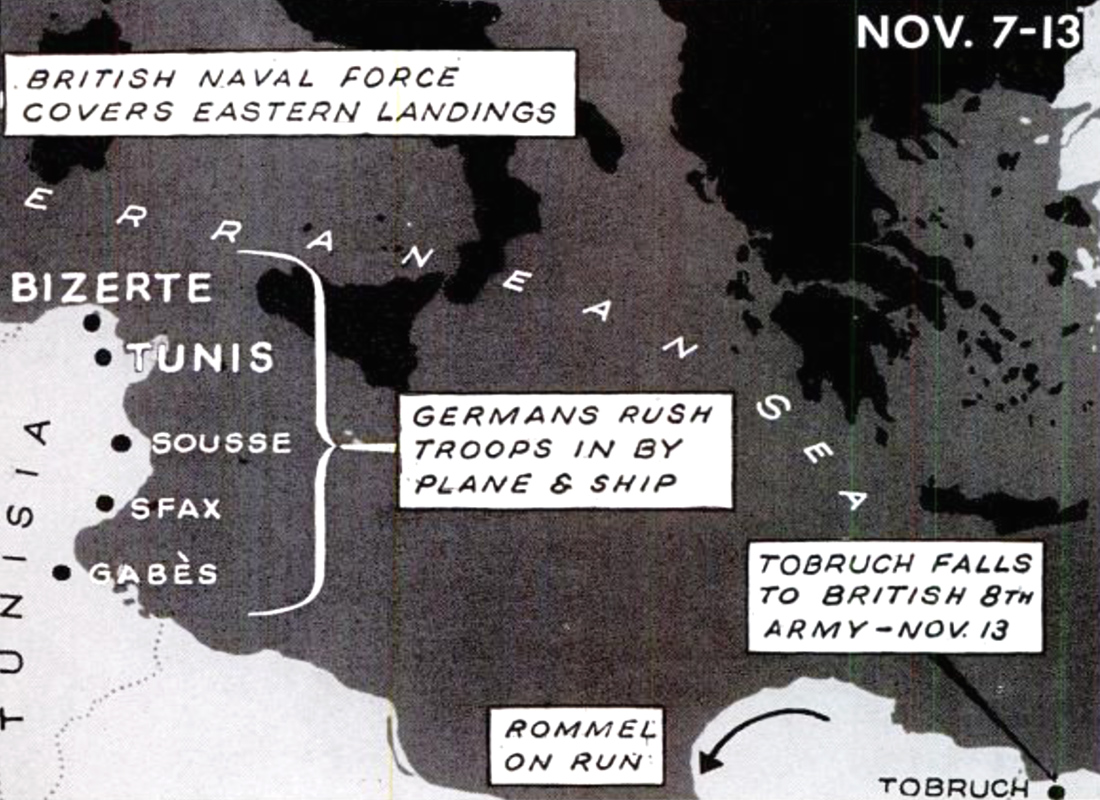
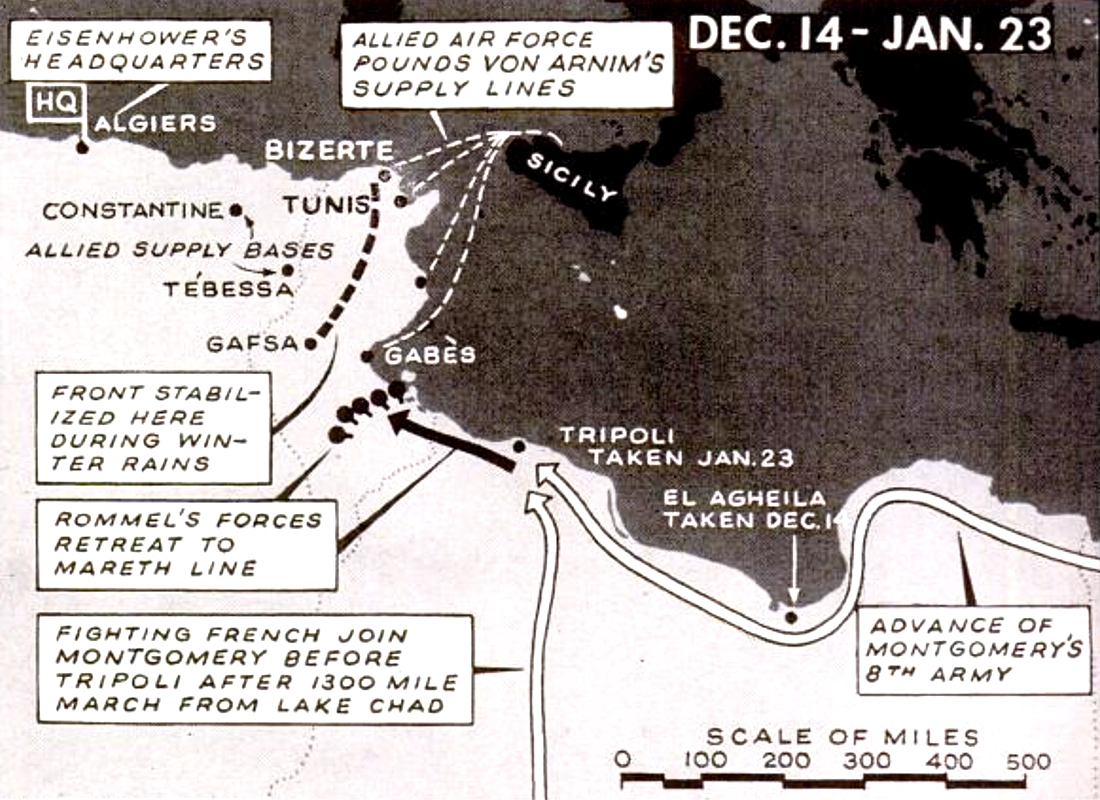
Rommel made a fighting withdrawal to El Agheila and then Tripoli, where Montgomery again defeated him, forcing the Axis to abandon Libya and attempt to regroup in French-ruled Tunisia.
Torch
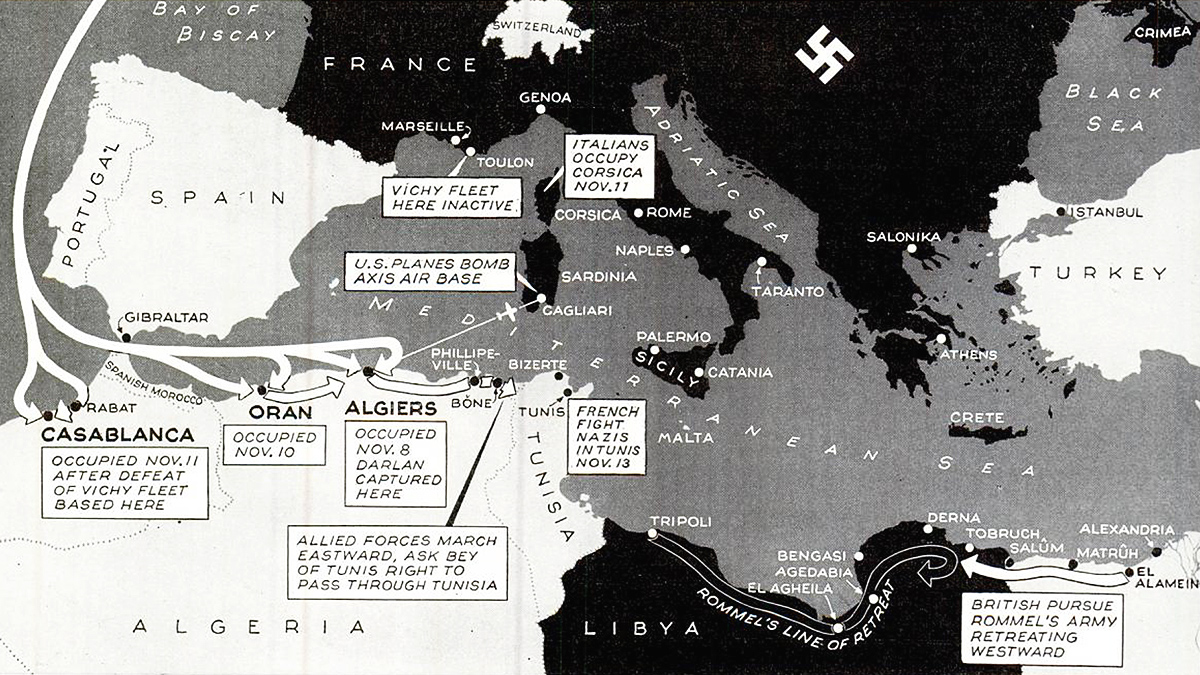
Since the entry of the Soviet Union and the United States into the war, the Allies had been planning to open a second front against the Axis in the west. The Americans argued for landings in France as early as 1942, but the British didn’t think they were ready. The first target would be the Vichy-held colonies in North Africa: Algeria, Morocco and Tunisia. Then the Allies could attack Rommel from two sides, drive the Axis out of Africa, establish command of the Mediterranean and invade Italy from the south.
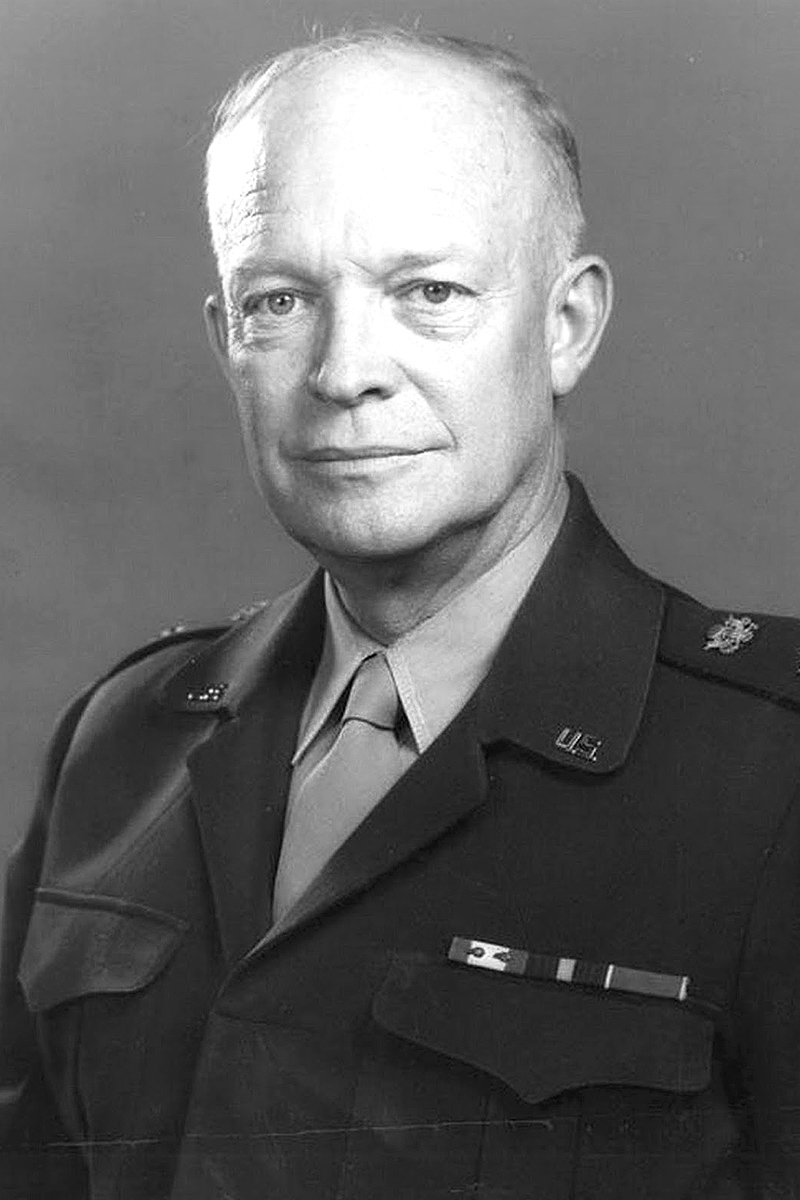
General Dwight D. Eisenhower was given overall command of what would become Operation Torch. It was described as an American-led operation in hopes that this would meet less resistance from Vichy-allied French commanders, who were still smarting from the British attack on Mers-el-Kebir in 1940. But it was really a joint Anglo-American effort. Two British admirals, Sir Andrew Cunningham and Sir Bertram Ramsay, planned the naval and amphibious landing components, respectively.
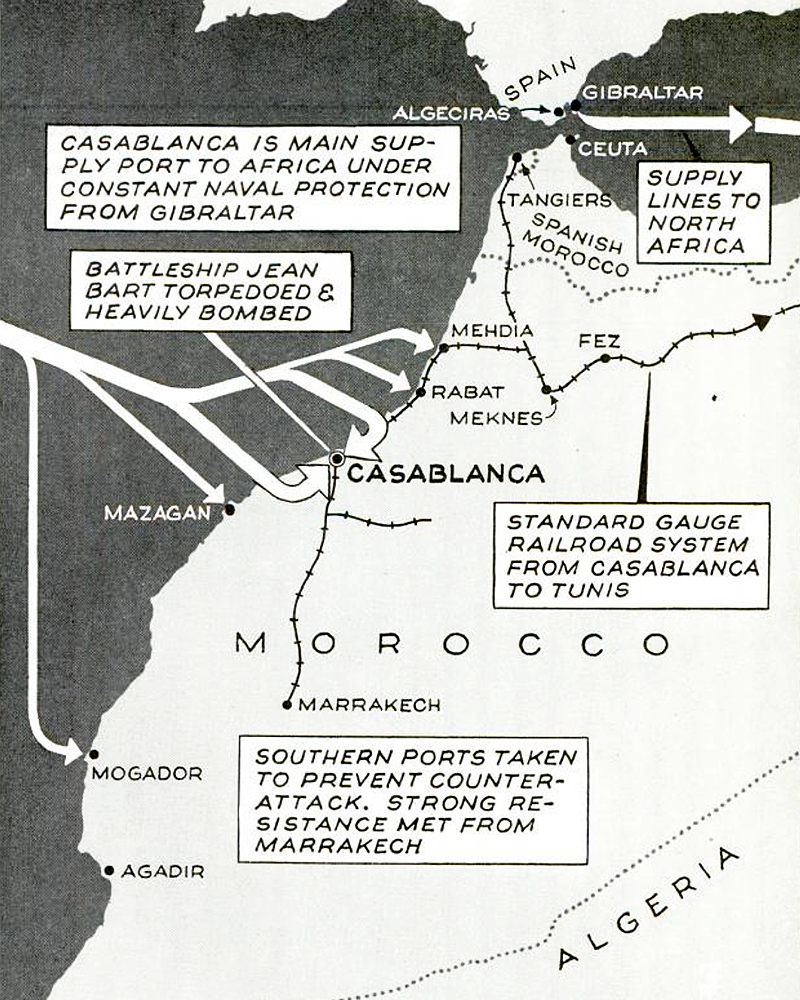
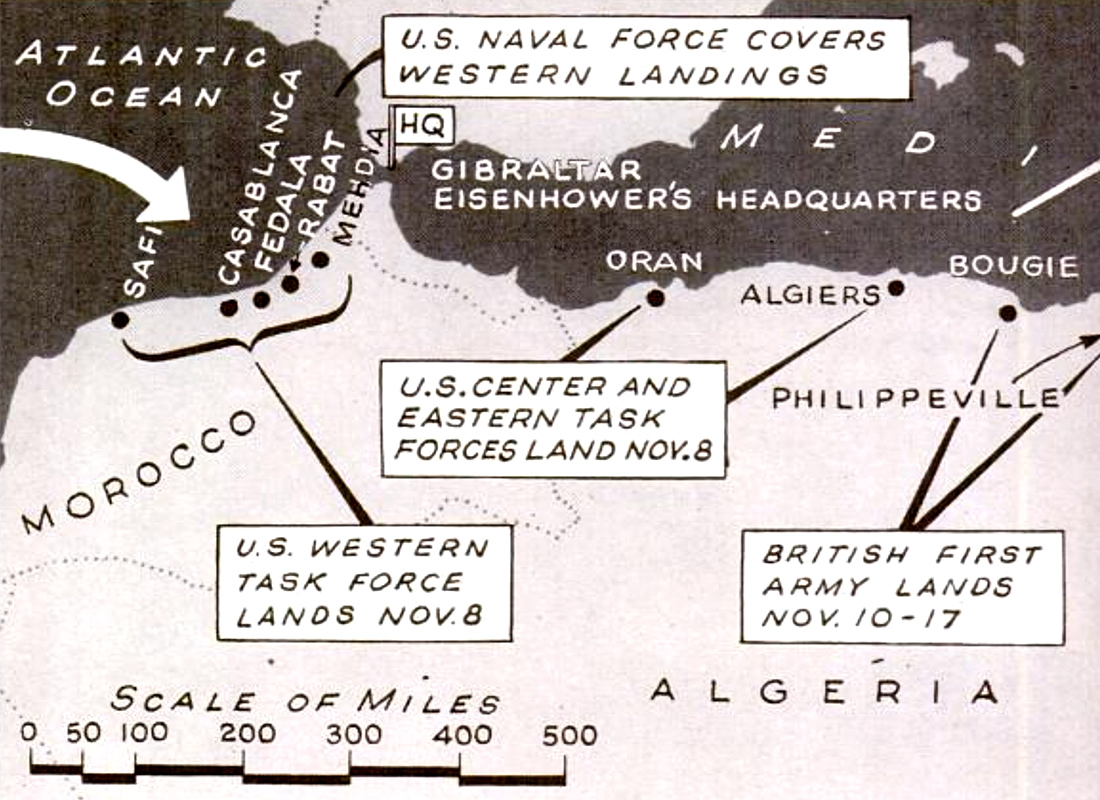
Algiers, Casablanca and Oran were identified as the best landing sites. Ideally there would also be a landing in Tunisia to halt Rommel’s retreat, but this would have put Allied troops within range of Axis airfields in Sardinia and Sicily. Eisenhower favored putting troops ashore at Bône, close to the Tunisian border, but the other military chiefs feared Torch might cause fascist Spain to abandon its neutrality and close the Straits of Gibraltar. Hence the need to secure Casablanca on the Atlantic coast.
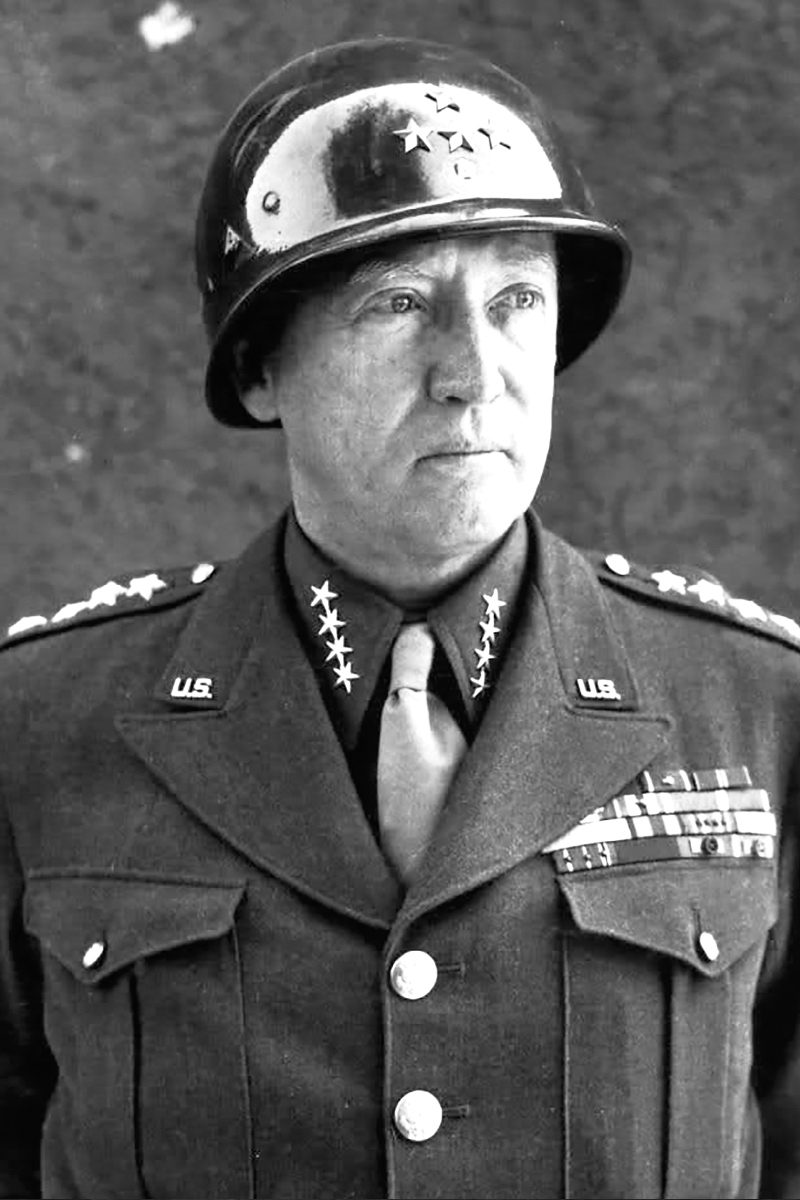
The Western Task Force that would take Casablanca was commanded by Major General George S. Patton. It landed before daybreak on November 8 without covering fire in the hope that the French might not resist at all. Once they did, Allied warships returned fire. The incomplete French battleship Jean Bart was disabled by the USS Massachusetts. Casablanca surrendered on November 10.
At Oren, the Vichy French fleet broke from the harbor and attacked the Allied invasion fleet, but its ships were all sunk or driven ashore. Heavy fire from the British battleships brought about Oren’s surrender on November 9.
In Algiers, mainly Jewish French Resistance fighters, led by Henri d’Astier de la Vigerie and José Aboulker, staged a coup, but they were unable to persuade Darlan, the commander of all Vichy French fighting forces, and General Alphonse Juin, the senior French Army officer in North Africa, to surrender. Only when the Americans and British landed at beaches near the city did Darlan and Juin realize their position was untenable. Darlan agreed to a ceasefire in exchange for continued French administration in North Africa with himself as “high commissioner”. Eisenhower agreed.
The deal was controversial in the West, given Darlan’s collaboration with the Nazis. From Vichy, Pétain ordered resistance to the Allied invasion, but he was ignored. The Germans responded by occupying the remainder of European France, which convinced Admiral Gabriel Auphan to scuttle the French fleet at Toulon. Darlan was assassinated by a French monarchist in December, after which De Gaulle — who had been deeply offended by Eisenhower’s deal with Darlan — emerged as the undisputed French leader.
Tunisia

By November 10, all French opposition to Torch had seized. While Rommel was moving in from the east, the Allies now raced to Tunisia from the west. The French governor of the colony, Jean-Pierre Esteva, was afraid to take sides and allowed both the Allies and the Axis use of his airfields. The local military commander, General Georges Barré, was more decisive, joining his forces with the Allies before Darlan could make his deal with Eisenhower.
Axis air superiority and torrential rains made for slow going. By the middle of December, the Allies were still only halfway to Tunis. In heavy fighting around Christmas, some 20,000 out of 135,000 American, British and French soldiers were killed. Eisenhower brought in more men and matériel from Morocco and Algeria while the Axis sent in some 243,000 reinforcements by air and sea.
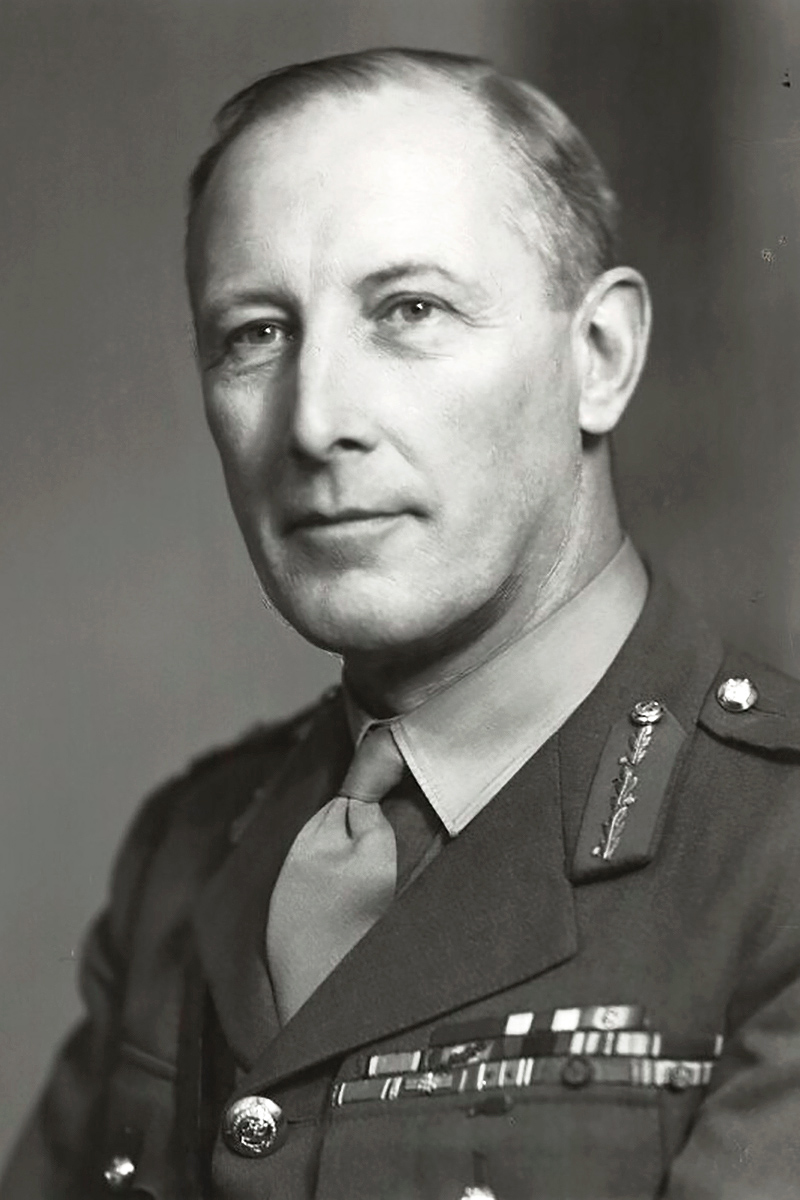
January brought little relief. Eisenhower put General Kenneth Anderson in overall command in an attempt to improve coordination. On January 23, Montgomery’s Eighth Army took Tripoli, driving Rommel farther west.
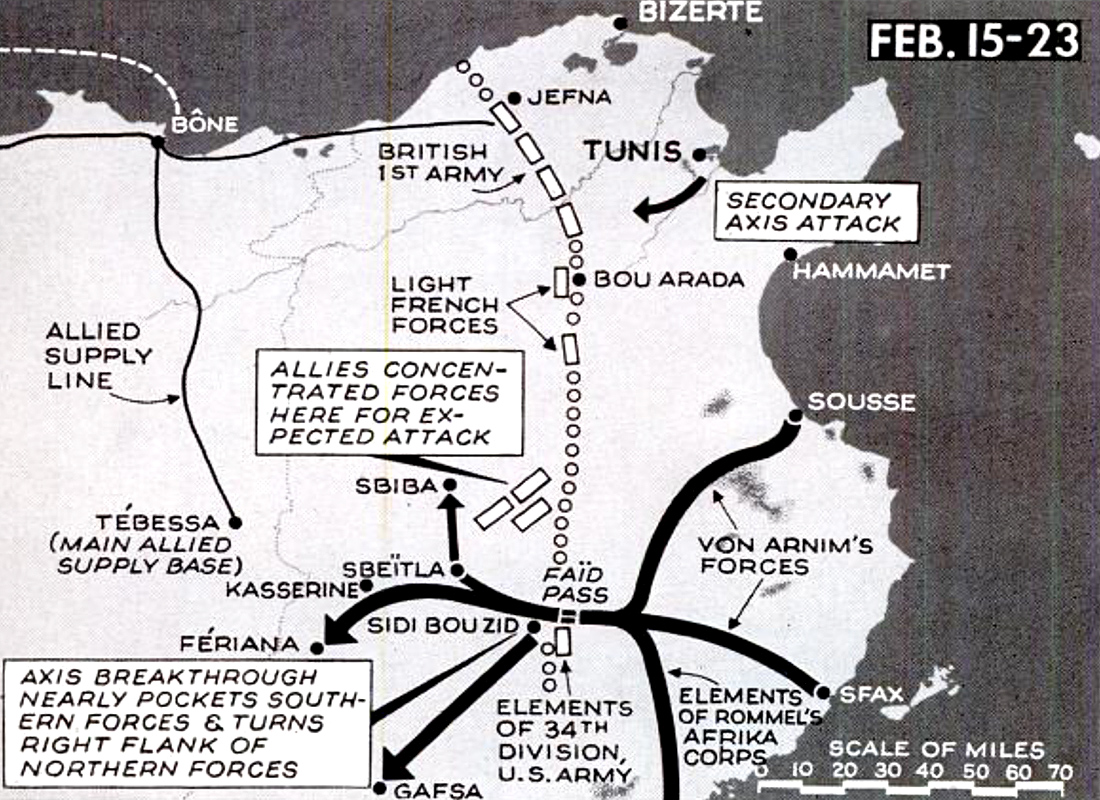
Having failed to stop Rommel’s army at Sidi Bouzid, the Allied met the retreating Afrika Korps head-on at the Kasserine Pass in the Atlas Mountains of central Tunisia. Despite outnumbering the Germans three-to-two, Rommel had the better of the inexperienced American II Corps led by Lloyd Fredendall. But he was still unable to break through.
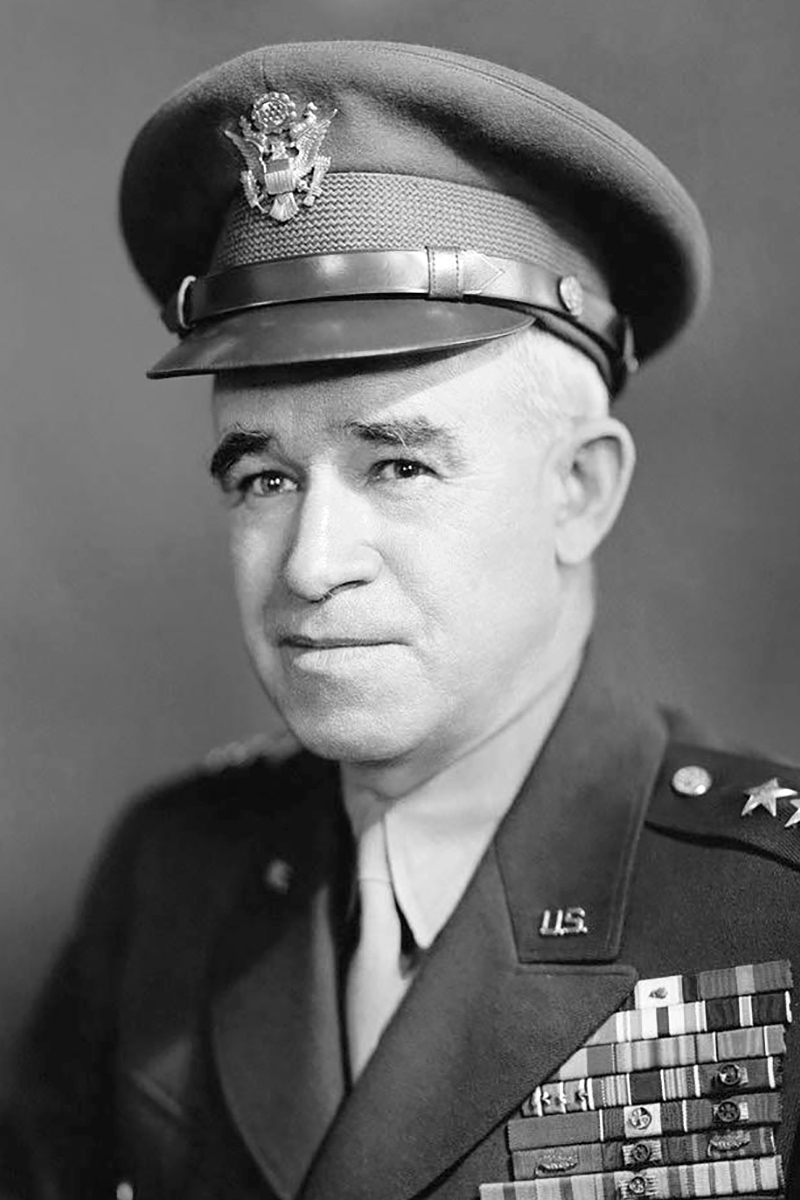
At the Casablanca Conference, Churchill and American president Franklin Roosevelt agreed to appoint Alexander as deputy commander-in-chief of the Allied forces in North Africa. Eisenhower put him in charge of a new 18th Army Group, which consisted of the British Eighth Army under Montgomery and the First Army under Anderson, which in turn included the American II Corps and the French XIX Corps. He replaced Fredendall with Patton, whose assistant corps commander was Omar Bradley.
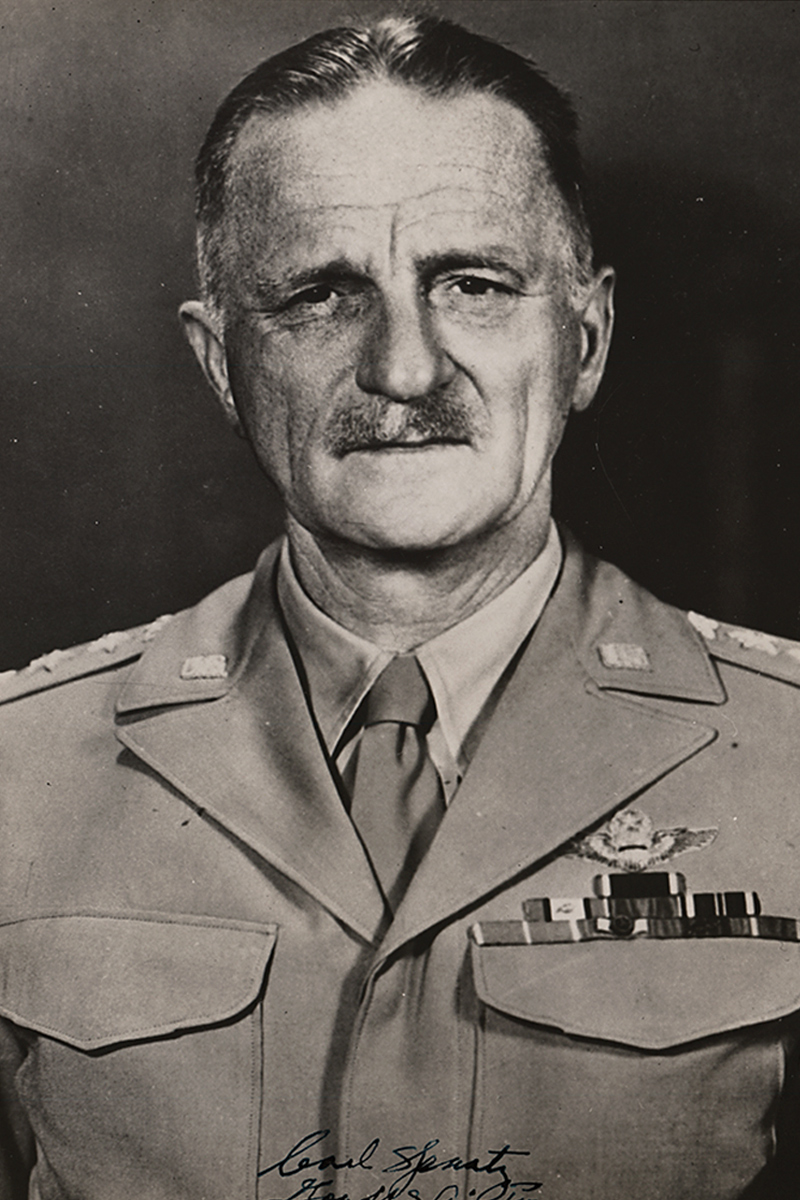
Allied air forces in the Mediterranean were also integrated. Air Chief Marshal Arthur Tedder was put in charge of Mediterranean Air Command. Major General Carl Spaatz served under him as commander of the Northwest African Air Forces, which had responsibility for all air operations in Tunisia.
The Axis reorganized their forces into a new Panzerarmee Afrika under Rommel. But he soon came into conflict with Hitler.
Fall of Tunis
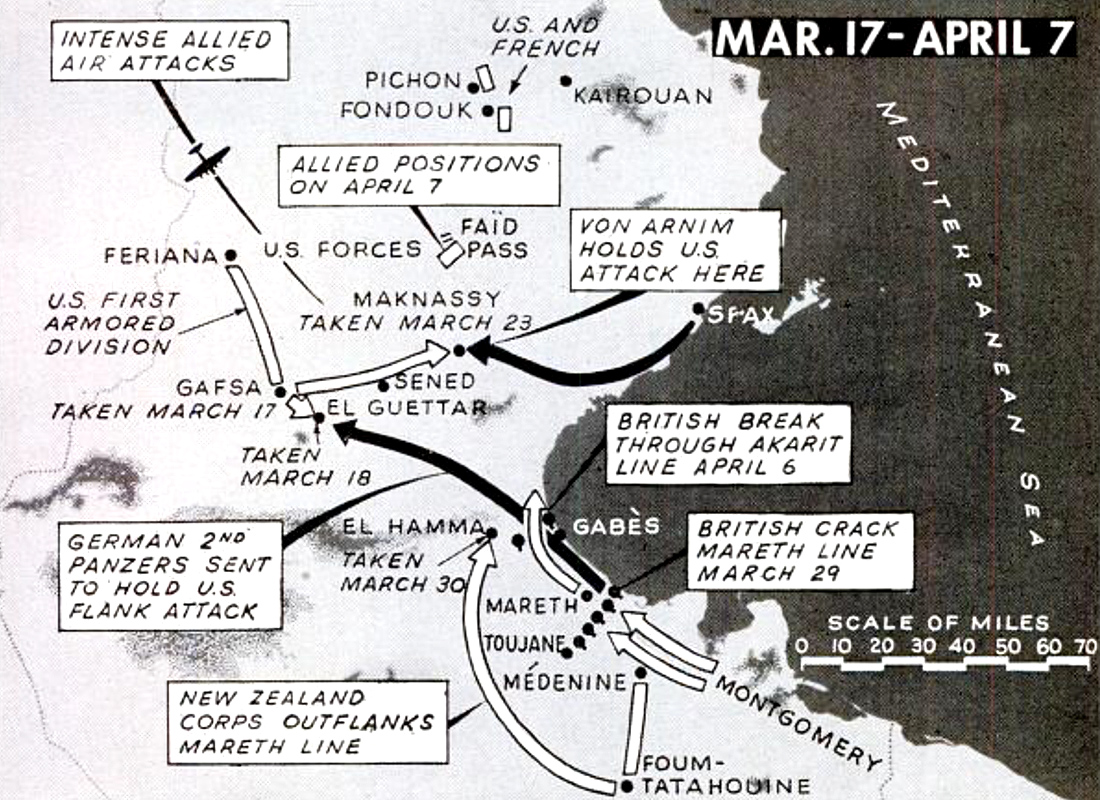
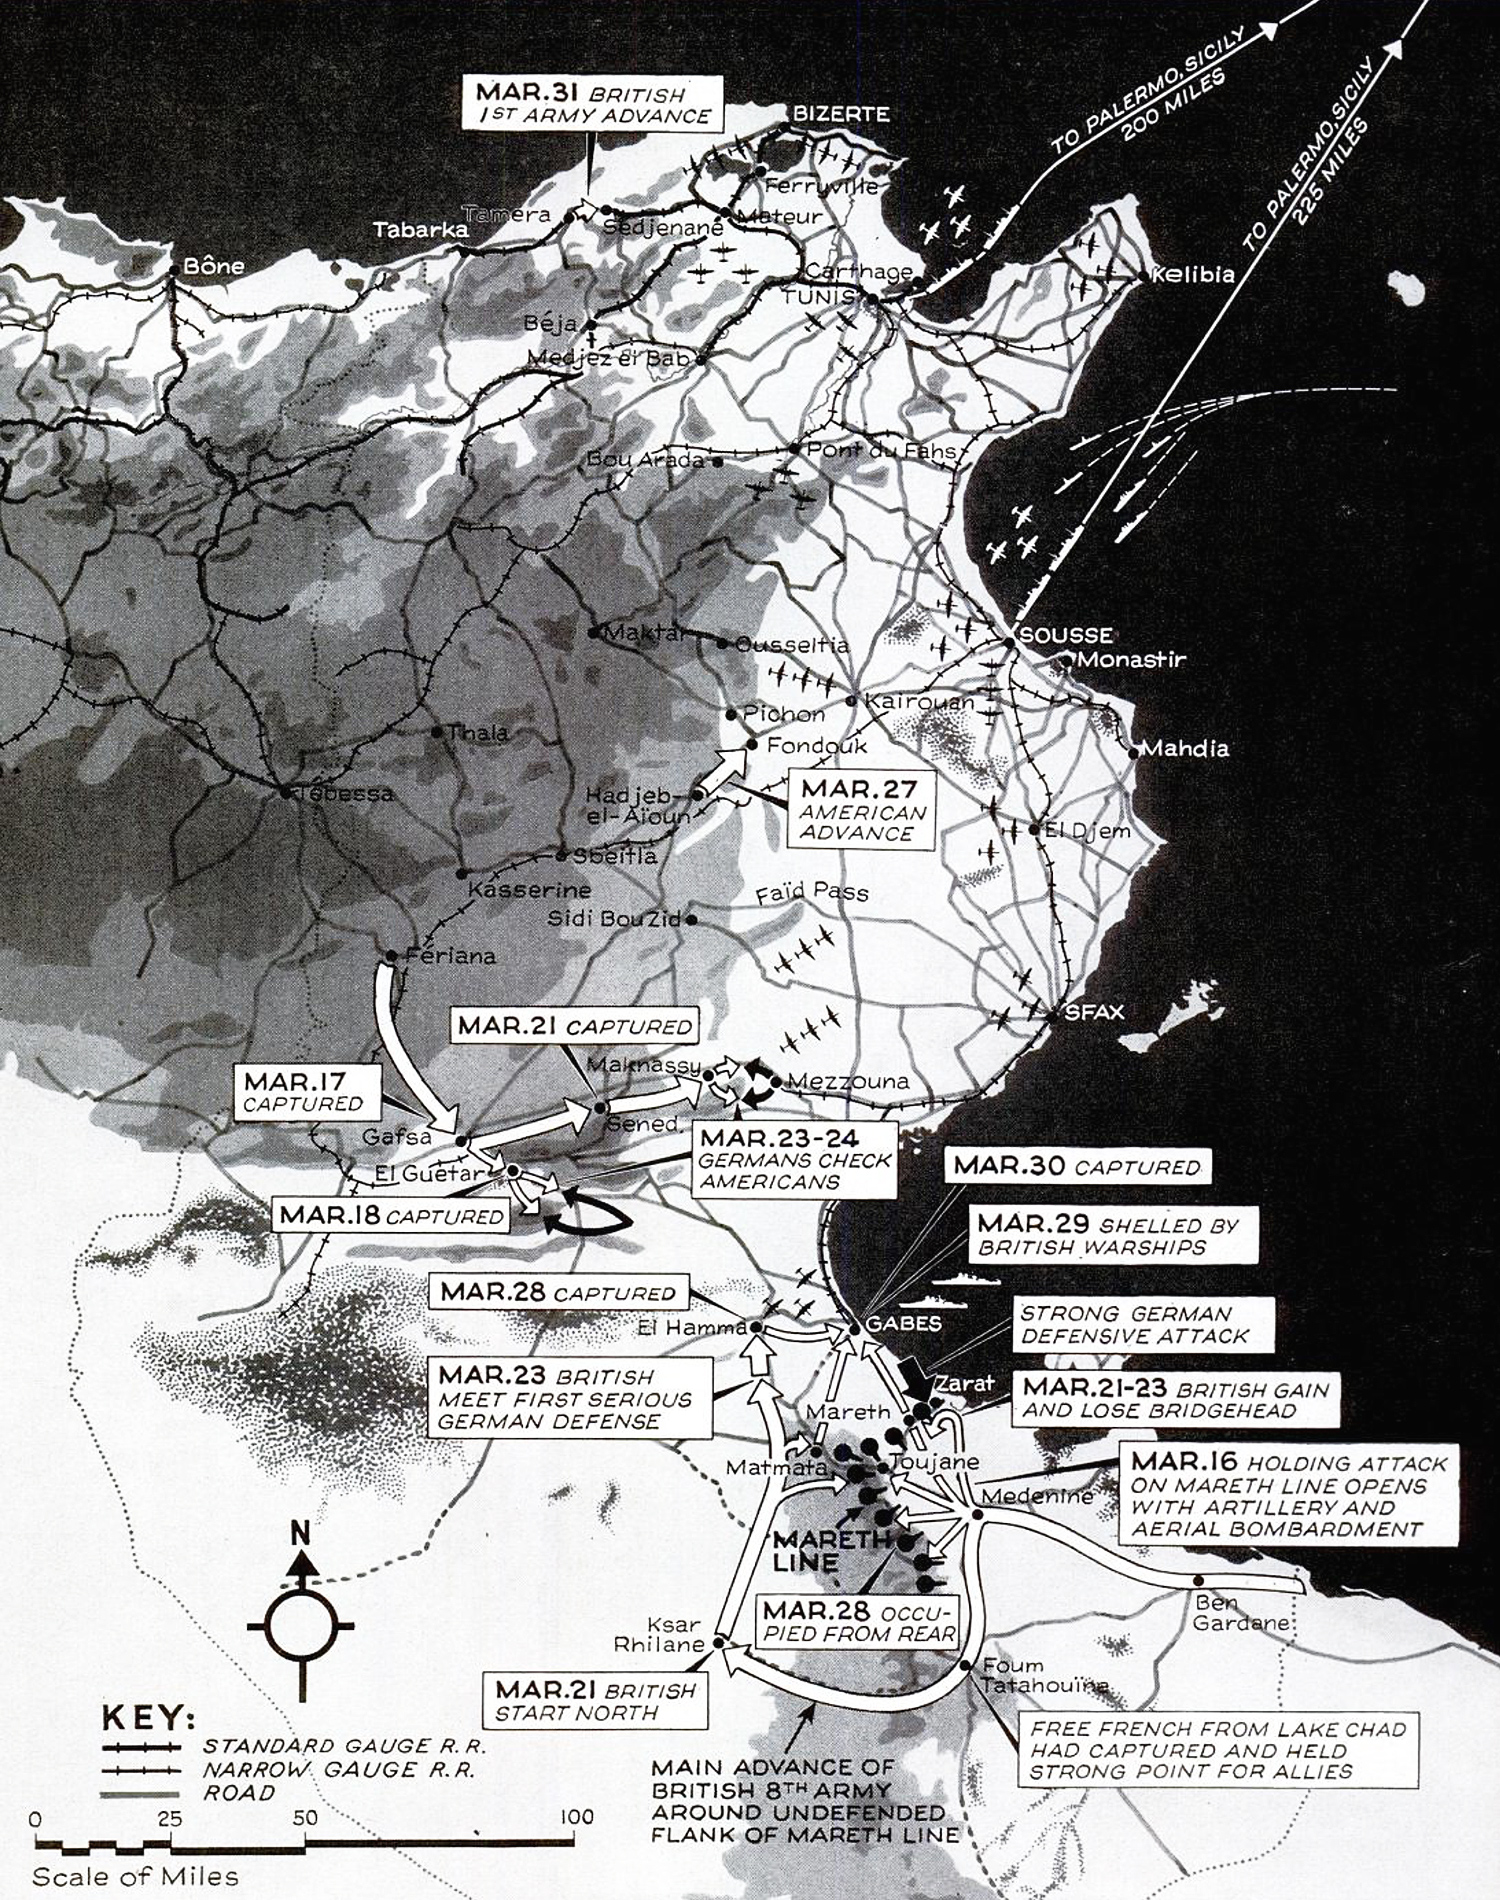
While the Americans were making slow progress in the west, Montgomery was advancing from the east. The Axis planned to stop him at the Mareth Line, a system of fortifications built by the French prior to World War II to defend Tunisia against attacks from then-Italian Libya. Rommel led a spoiling attack southeast of the line at Medenine on March 6, but the British had been forewarned by decrypted German wireless communications and were able to push him back while destroying 52 of his tanks.
The Desert Fox knew the game was up. He flew to Rome on March 9 and Hitler’s headquarters in Ukraine the next day to convince the Axis leadership that North Africa was lost and the only way to save the army was to pull it back to Europe. Hitler wouldn’t listen and put Rommel’s deputy, Hans-Jürgen von Arnim, in charge of the Panzerarmee. Rommel was placed on sick leave. The Mareth Line fell before the end of the month.
Under Patton, II Corps stood its ground at El Guettar, taking out forty Axis tanks against a loss of 25. With Montgomery advancing up the coast, beating the Axis at Gabès, it was only a matter of time before the Americans and British would link up at Tunis.
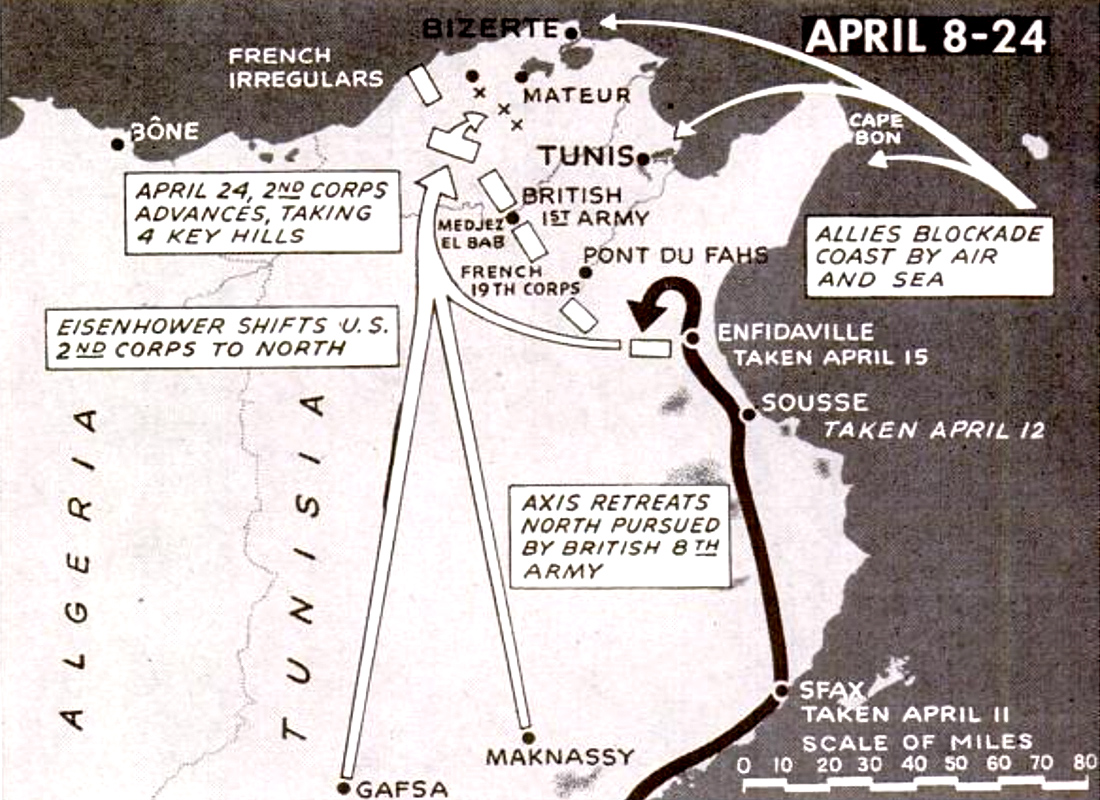
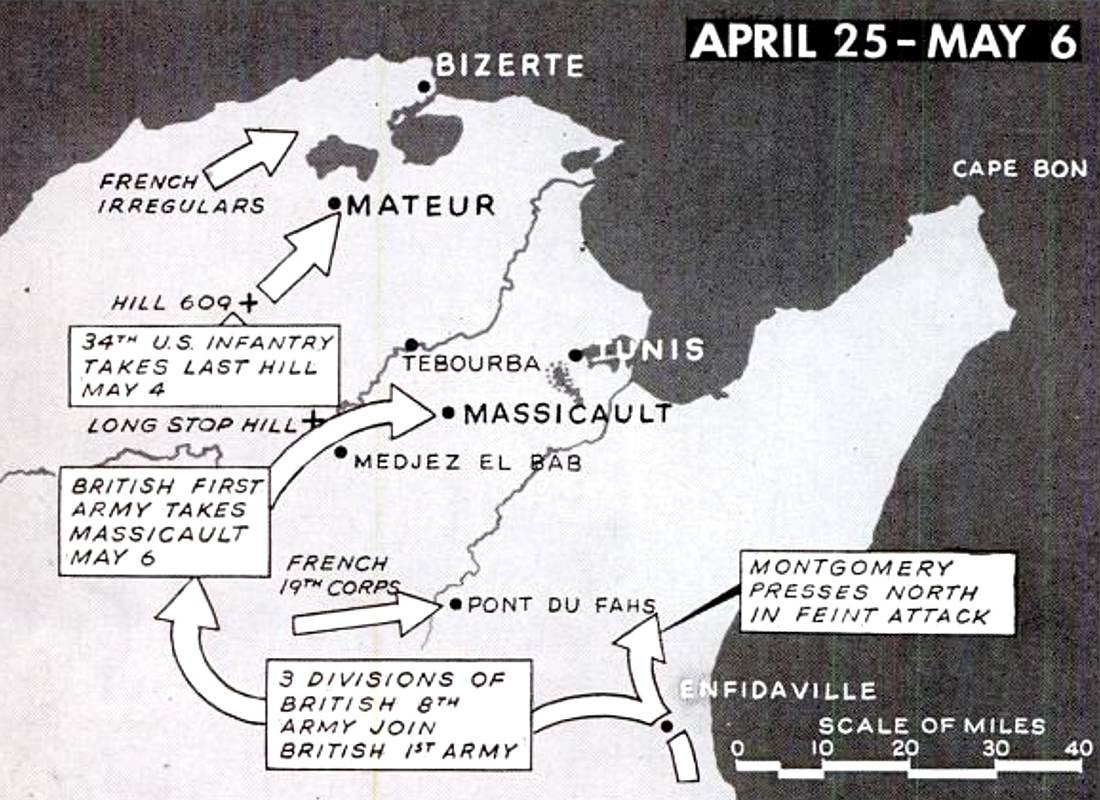
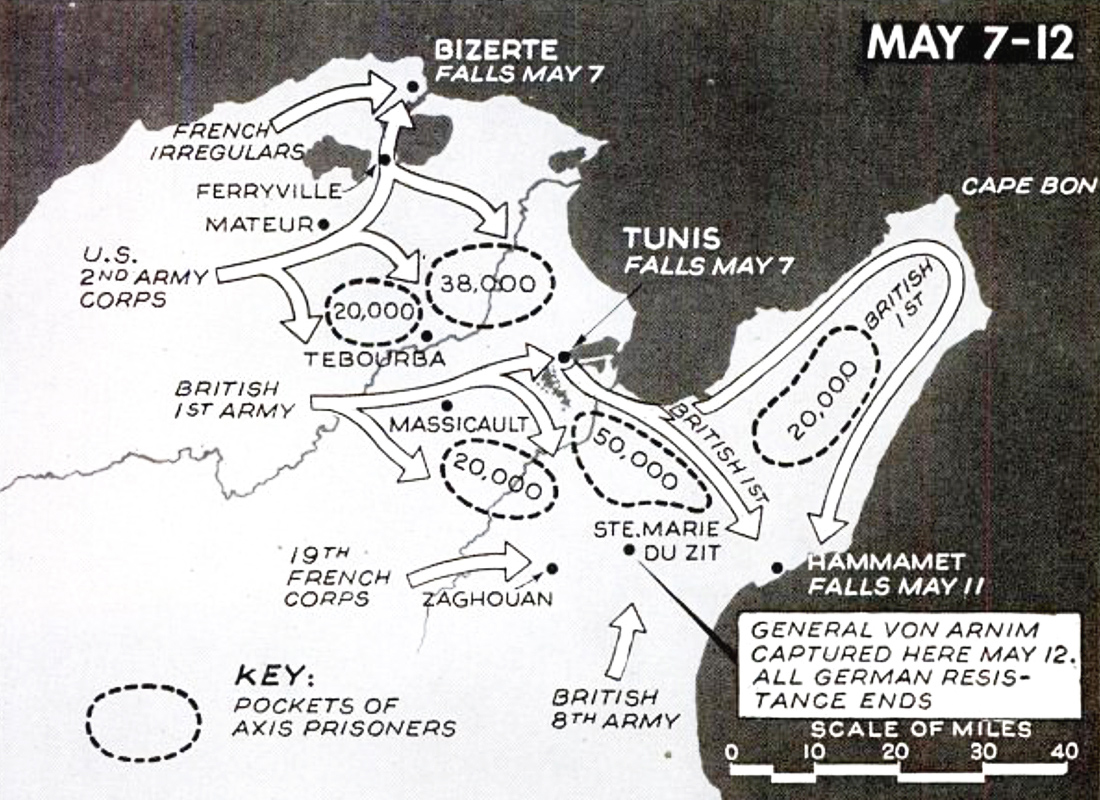
Alexander ordered a large-scale assault for April 22. Tedder’s aircraft were now able to operate from airfields in Tunisia and intercept Axis aerial supplies. The Royal Navy made Axis reinforcements (or an evacuation) by sea impossible. Patton attacked on the north toward Bizerte, Montgomery from the east toward Enfidaville while Anderson’s First Army led the frontal assault on Tunis. The first British armor entered the city on May 7.
Six days later, Axis resistance in Africa melted away when some 230,000 soldiers surrendered. The Allies could now turn their attention to Italy.


1 Comment
Add YoursMany thanks for another detailed and informative article! Those epic struggles put most of our loud but trivial present-day storms-in-teacups into proportion.